
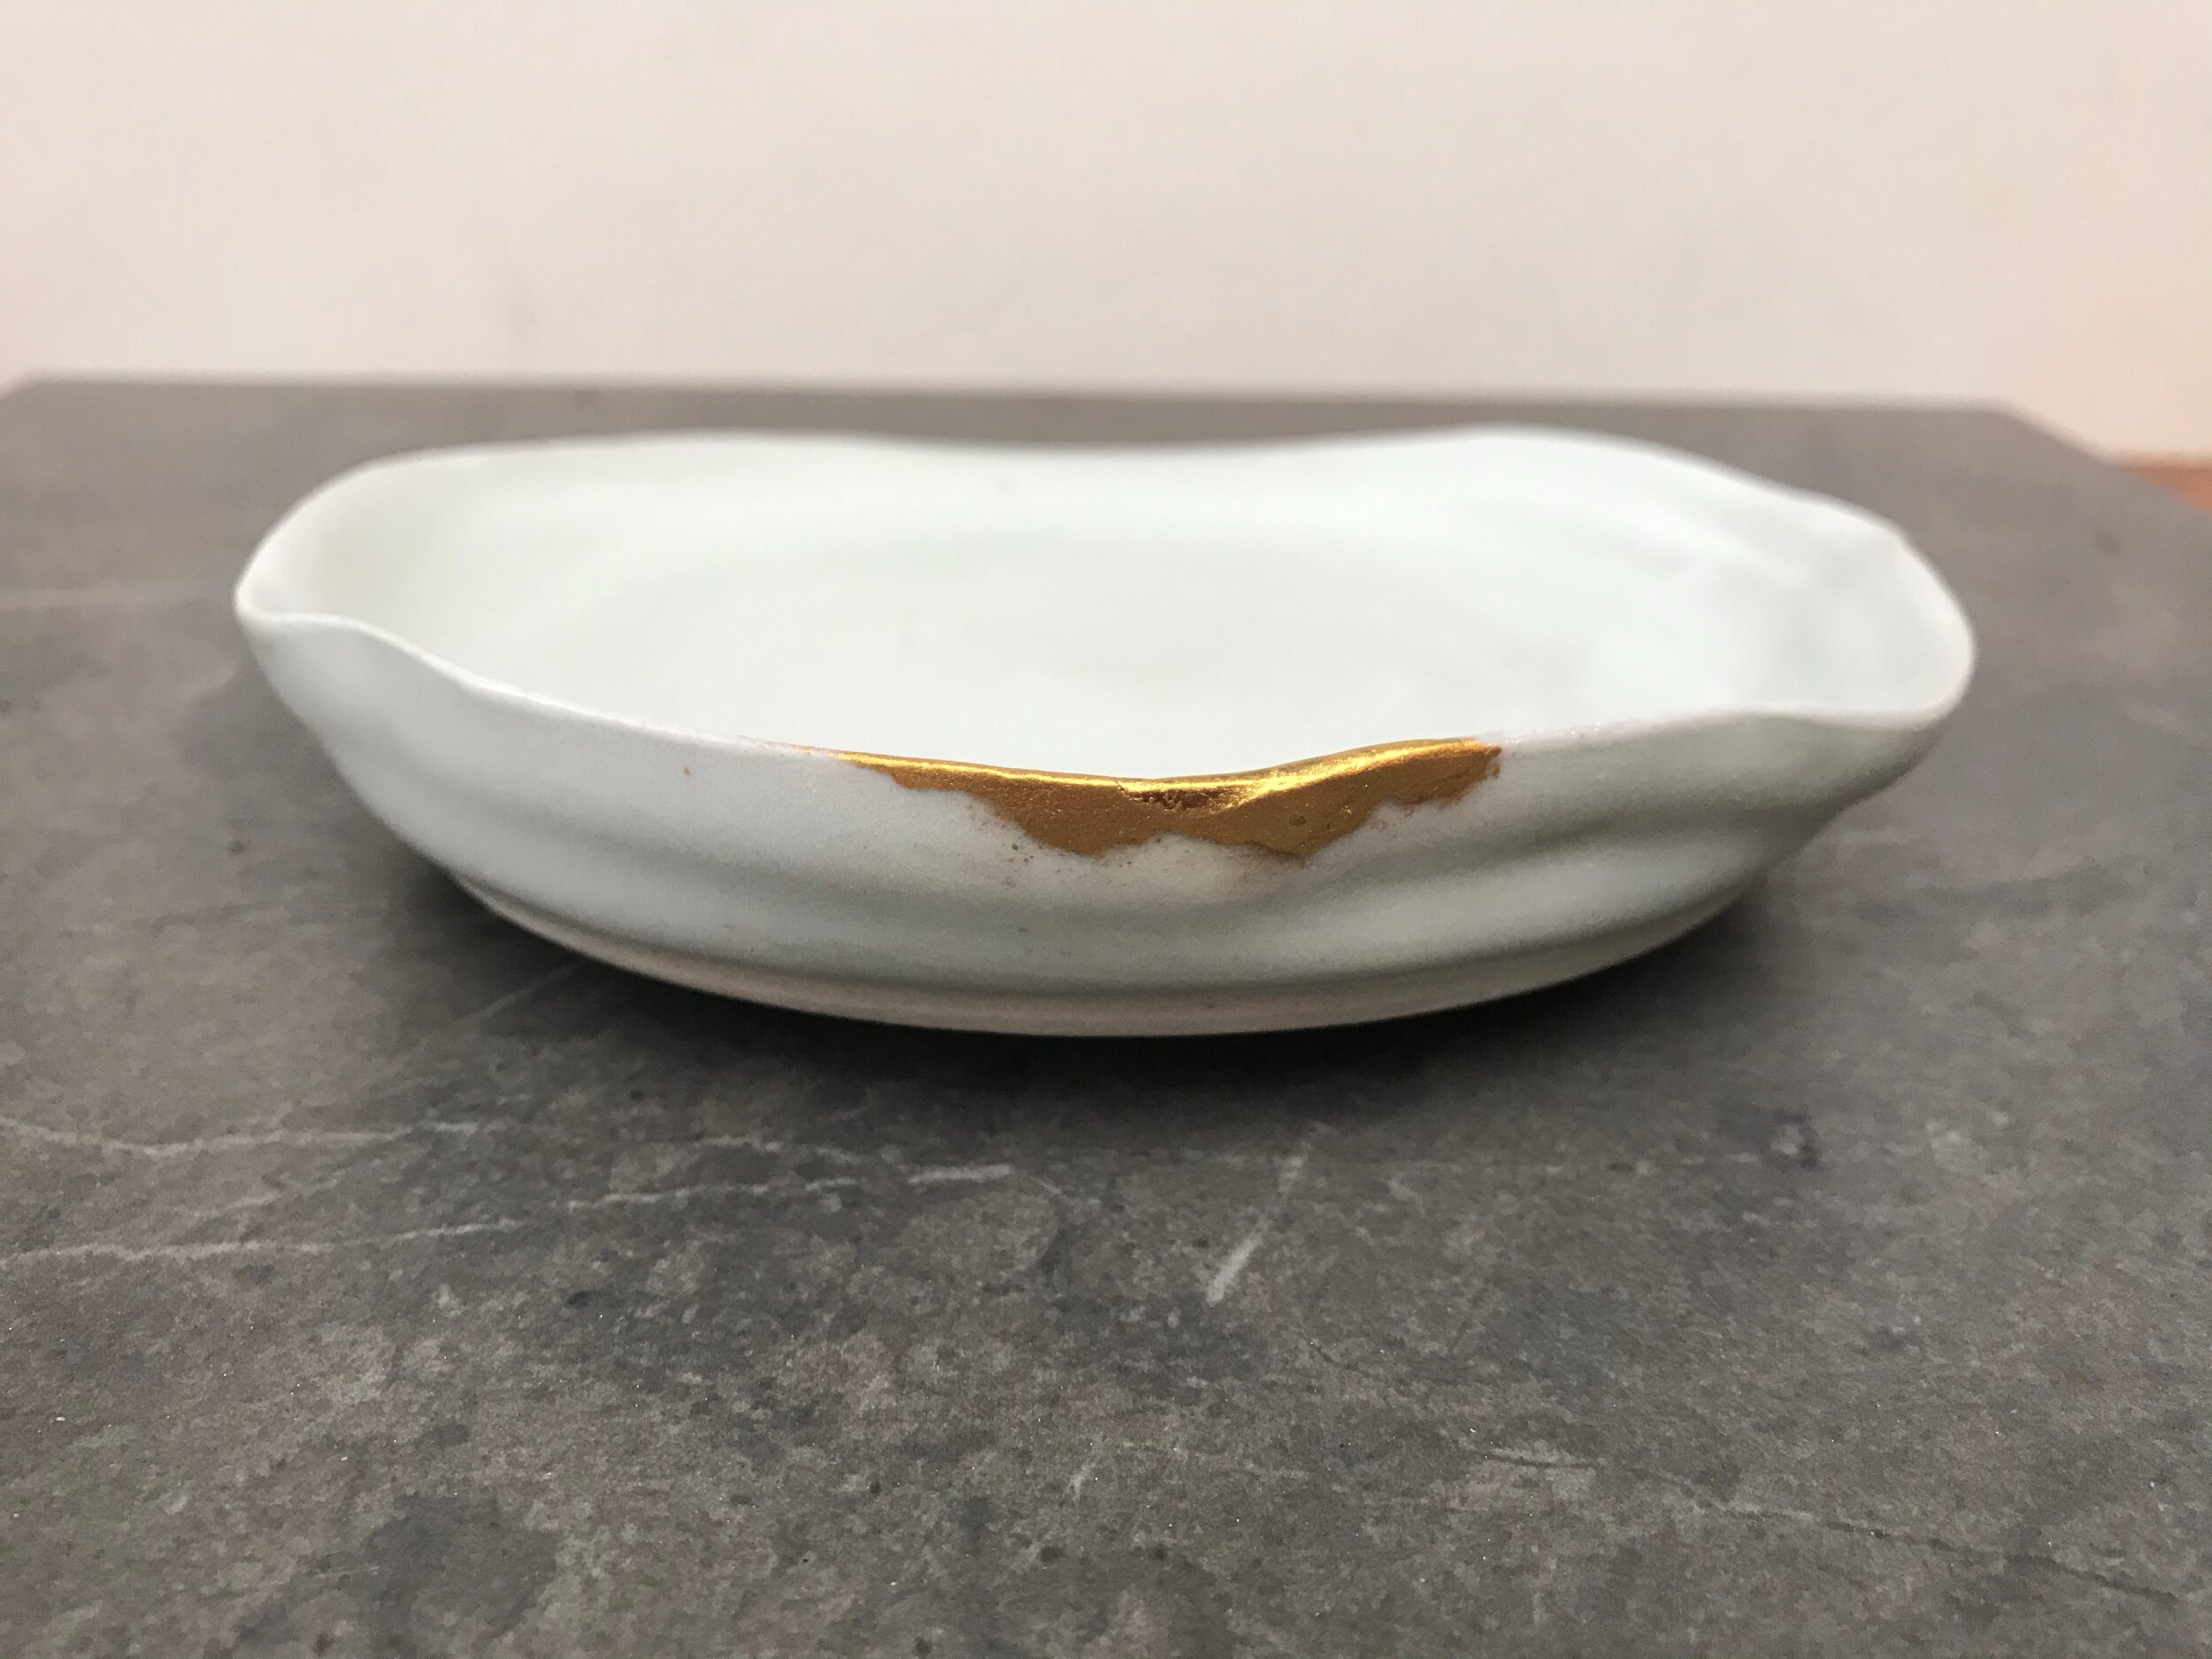
Our kintsugi journey continues… part 3
What a huge step. Some months ago I decided I needed to know more about this amazing artform. With a lot of online research, inquiries through friends and strangers I found a course in Japan. The one I really wanted to do was unachievable right now – too much time and cost. But with perseverance I found an alternative – not so long and not as expensive. Still costly but hey your passion is worth it isn’t it?
I made the commitment, paid my deposit and started the months of planning to go to Japan and study with someone who I didn’t know, hadn’t met but who said he’d been practicing and teaching kintsugi for over 20 years. He’d lived in Japan for about 30 years and spoke English so a bonus really.
The lady in the currency exchange asked “do you know this person?”. “Um well no I don’t but he seems reputable”. She said “internet scams you need to be careful”. I figured that if I got there and he wasn’t at the other end when I got off the bus I’d done my money. It was a risk I was prepared to take as he sounded genuine from this end.
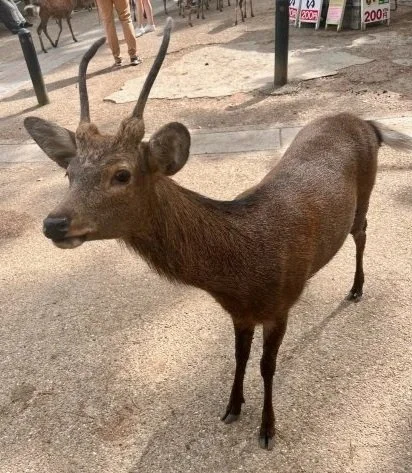
I wasn’t disappointed. It was an amazing experience and one I do not regret doing nor paying that much money for. I got to stay in a ryokan, a traditional Japanese inn with the loveliest hostess who fed me the most amazing food every day. It was out in the country about 20kms from Nara a truly lovely small city with lots of interesting sights including their famous deer park.
I learnt so much from my sensei, Dave. He is American and we had some little idiosyncrasies with language but he was an easy communicator and certainly knows his craft. He organised tools for me (over and above the ones that came with the course kit), gave me notes, worked me through the entire process though because of time constraints it wasn’t a start to finish process and we jumped around a bit. But so worthwhile.
His instructions were to bring 10-12 broken pieces of pottery which meant a bit of a rush around towards the end to get some broken pieces and to break a few too. But with the help of some local potters I ended up with some challenging and interesting projects to work on. Of the eight I took I finished three, four more in differing stages are on their way back and one project didn’t get started but we had discussions about how to manage that one now I’m home. Plus I bought a little antique cup with a chip in it – just because I loved it and that’s in progress now.
As some of the pieces needed more drying time they are on their way back now by post – plus I doubt I could have fitted them in my suitcase. I bought enough bits and pieces (mainly Japanese skin care and snacks) to take up any spare space.
I’ve put finished photos up on my kintsugi page and will post more when the rest arrive as I progress those projects.
I’m so looking forward to practicing what I’ve learnt and doing more repairs to give new life to special pieces for people who love kintsugi as much as I do.


Our Kintsugi journey continues
Well it seems there is a lot of interest in Kintsugi and in particular a lot of interest in Kintsugi in Adelaide. Which is good as it has brought you to my website to discover more.
I love Kintsugi!
Kintsugi is part of Japanese culture. The word is actually two words – kin meaning gold and tsugi meaning join, joining, subsequent or successor. I recently heard tsugi described as connected to the world or a generation.
I found this description of it - Kintsugi is the Japanese art of putting broken pottery pieces back together with gold — built on the idea that in embracing flaws and imperfections, you can create an even stronger, more beautiful piece of art. Every break is unique and instead of repairing an item like new, the 400-year-old technique actually highlights the "scars" as a part of the design. Using this as a metaphor for healing ourselves teaches us an important lesson: Sometimes in the process of repairing things that have broken, we actually create something more unique, beautiful and resilient.
While both concepts are appealing, I’m drawn to the idea of being connected to a generation or the world.
I’ve had a number of people come to me with broken treasures – some not so little.
The first was a friend with a beautiful little tea cup given to her by her mother.
Then Sue who had two very old large meat platters that belonged to her grandmother that were broken years ago. She could not bear to part with the pieces, which have been in a box for many years.

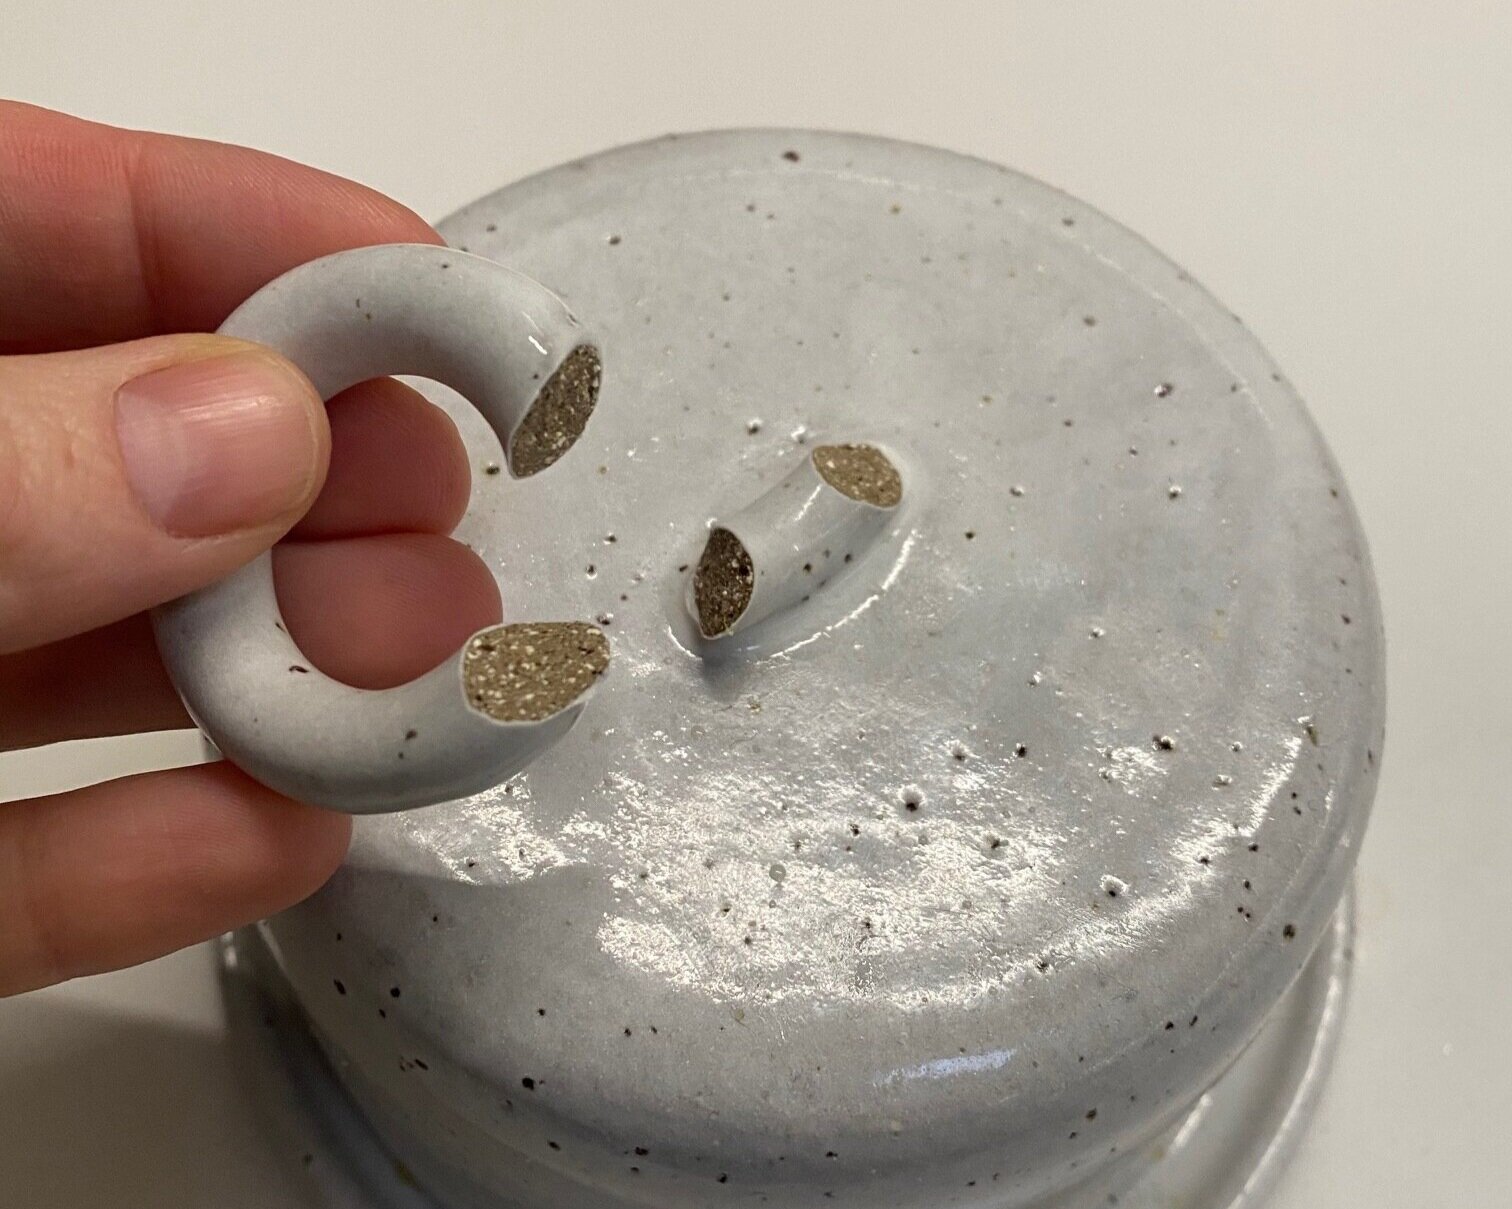
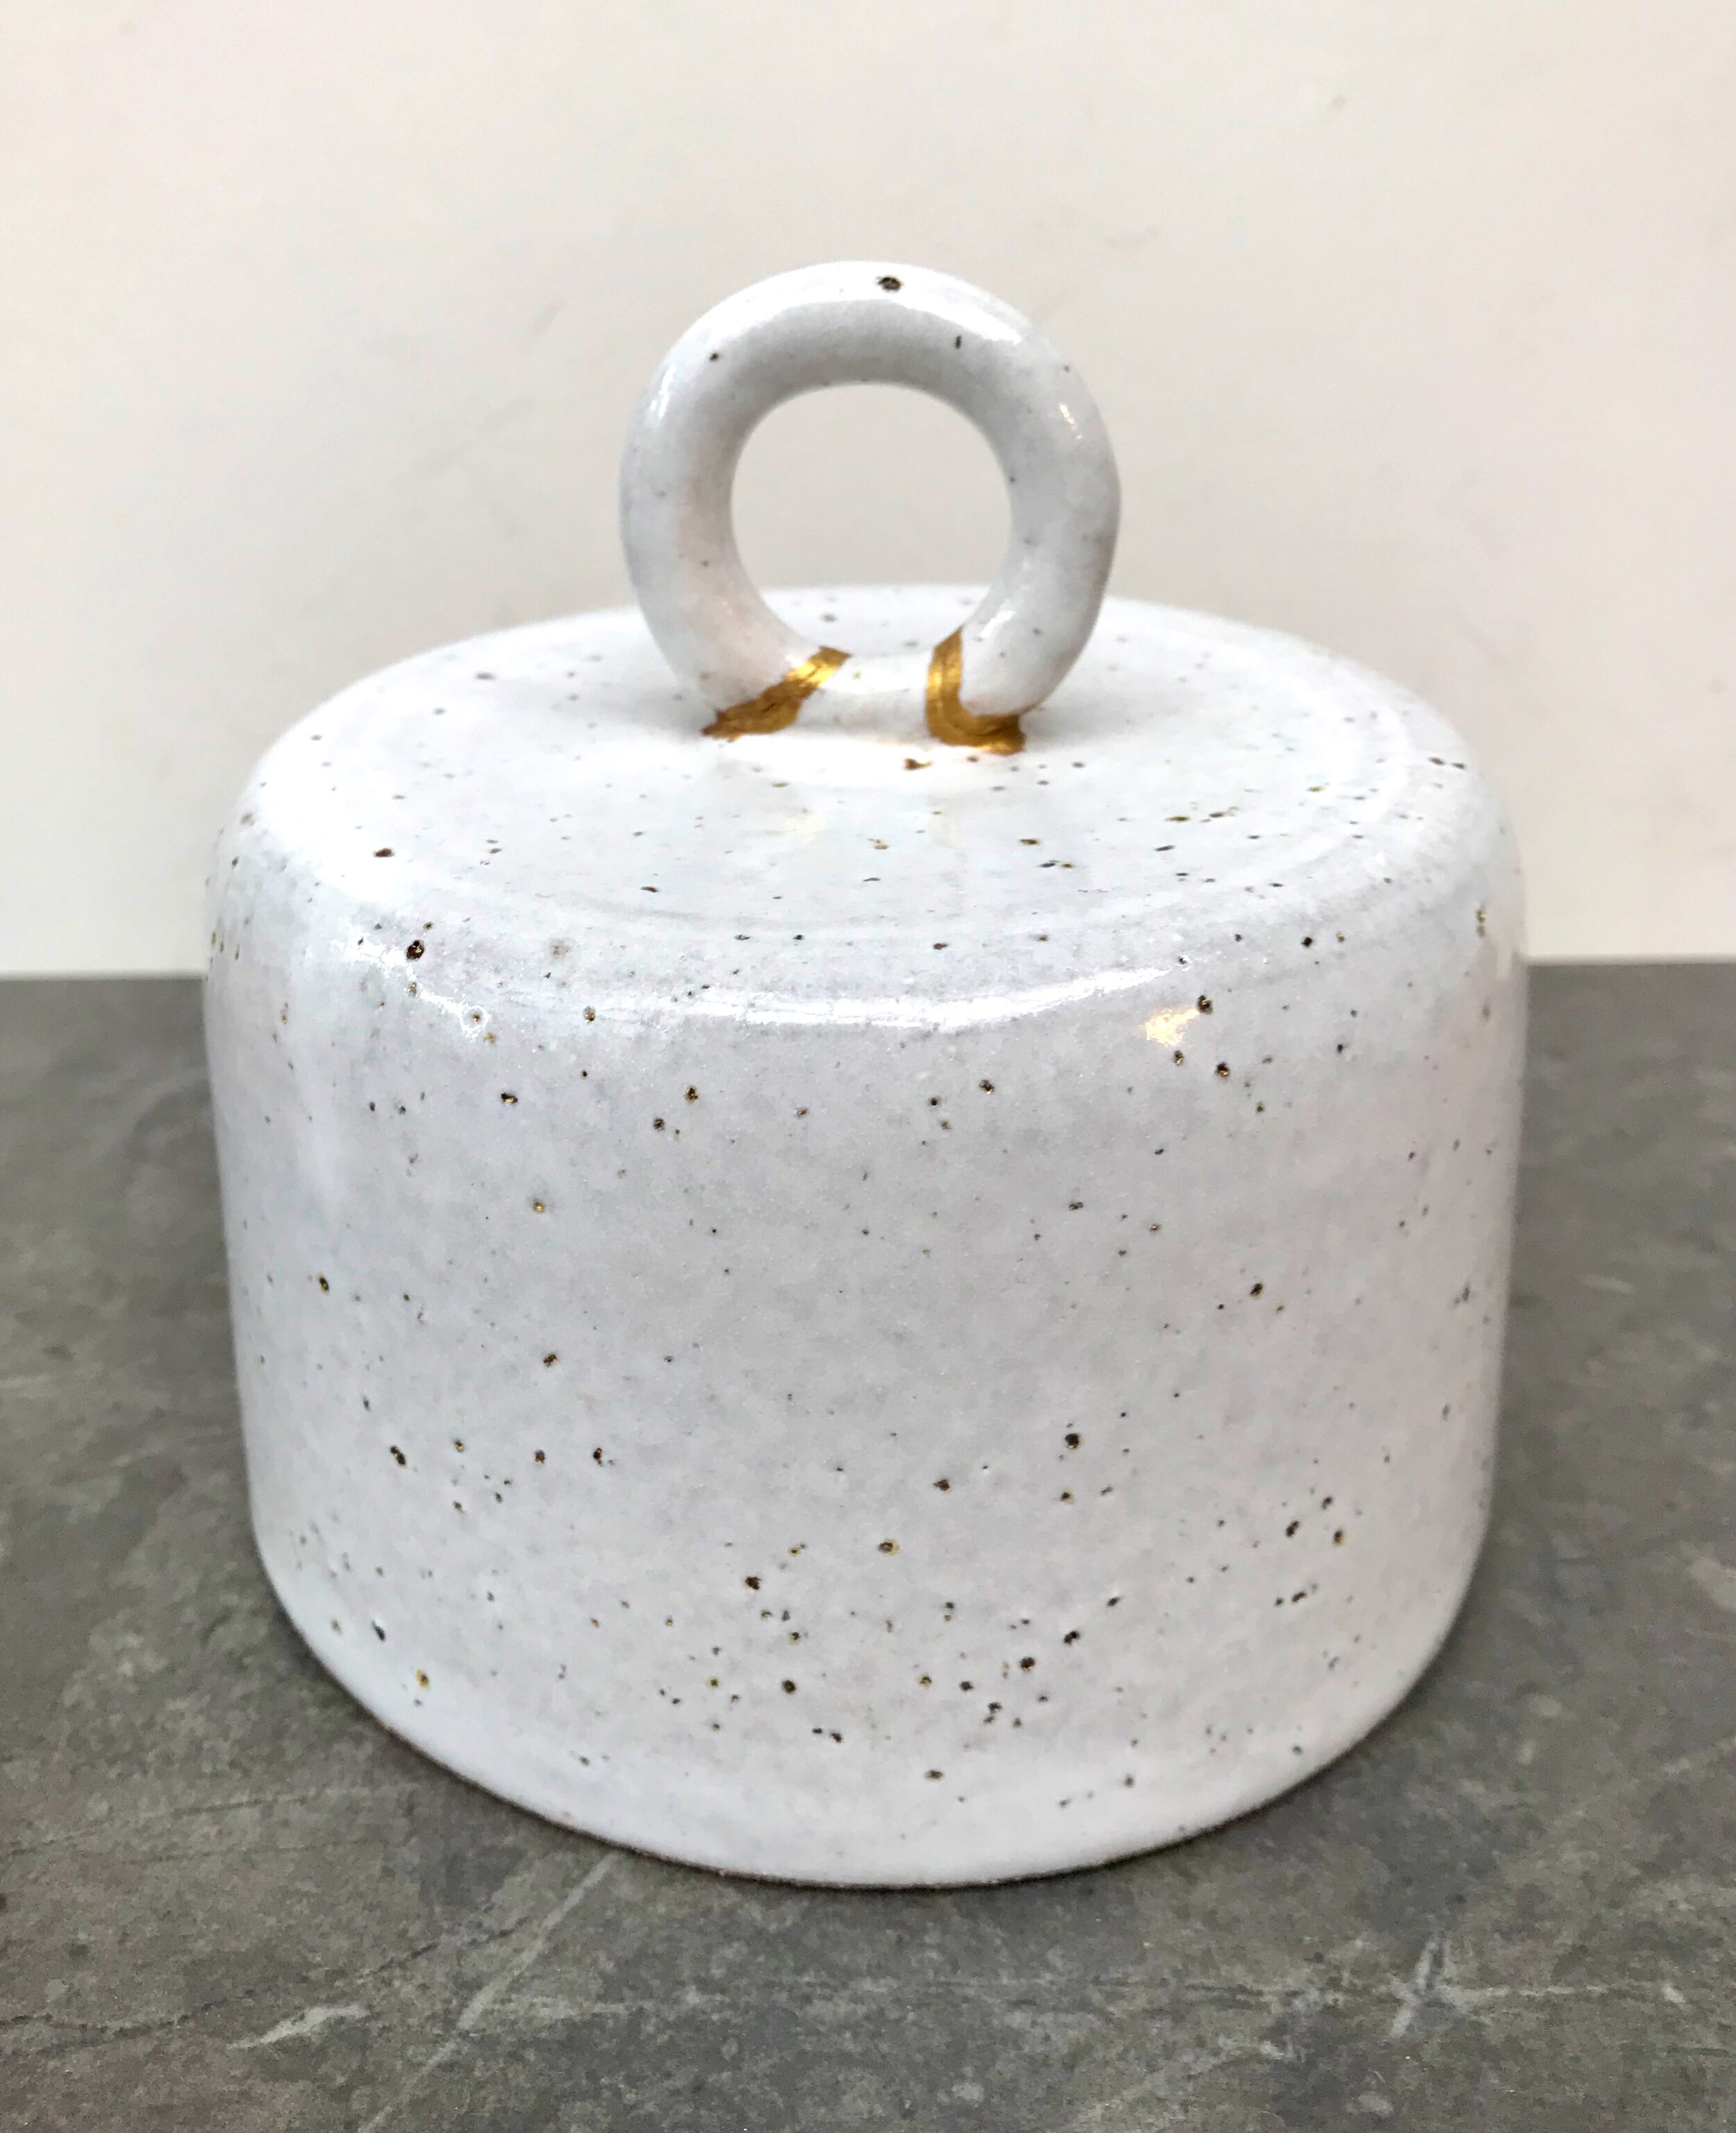
Claire who had a cheese cloche with broken handle and a chipped pottery plate.
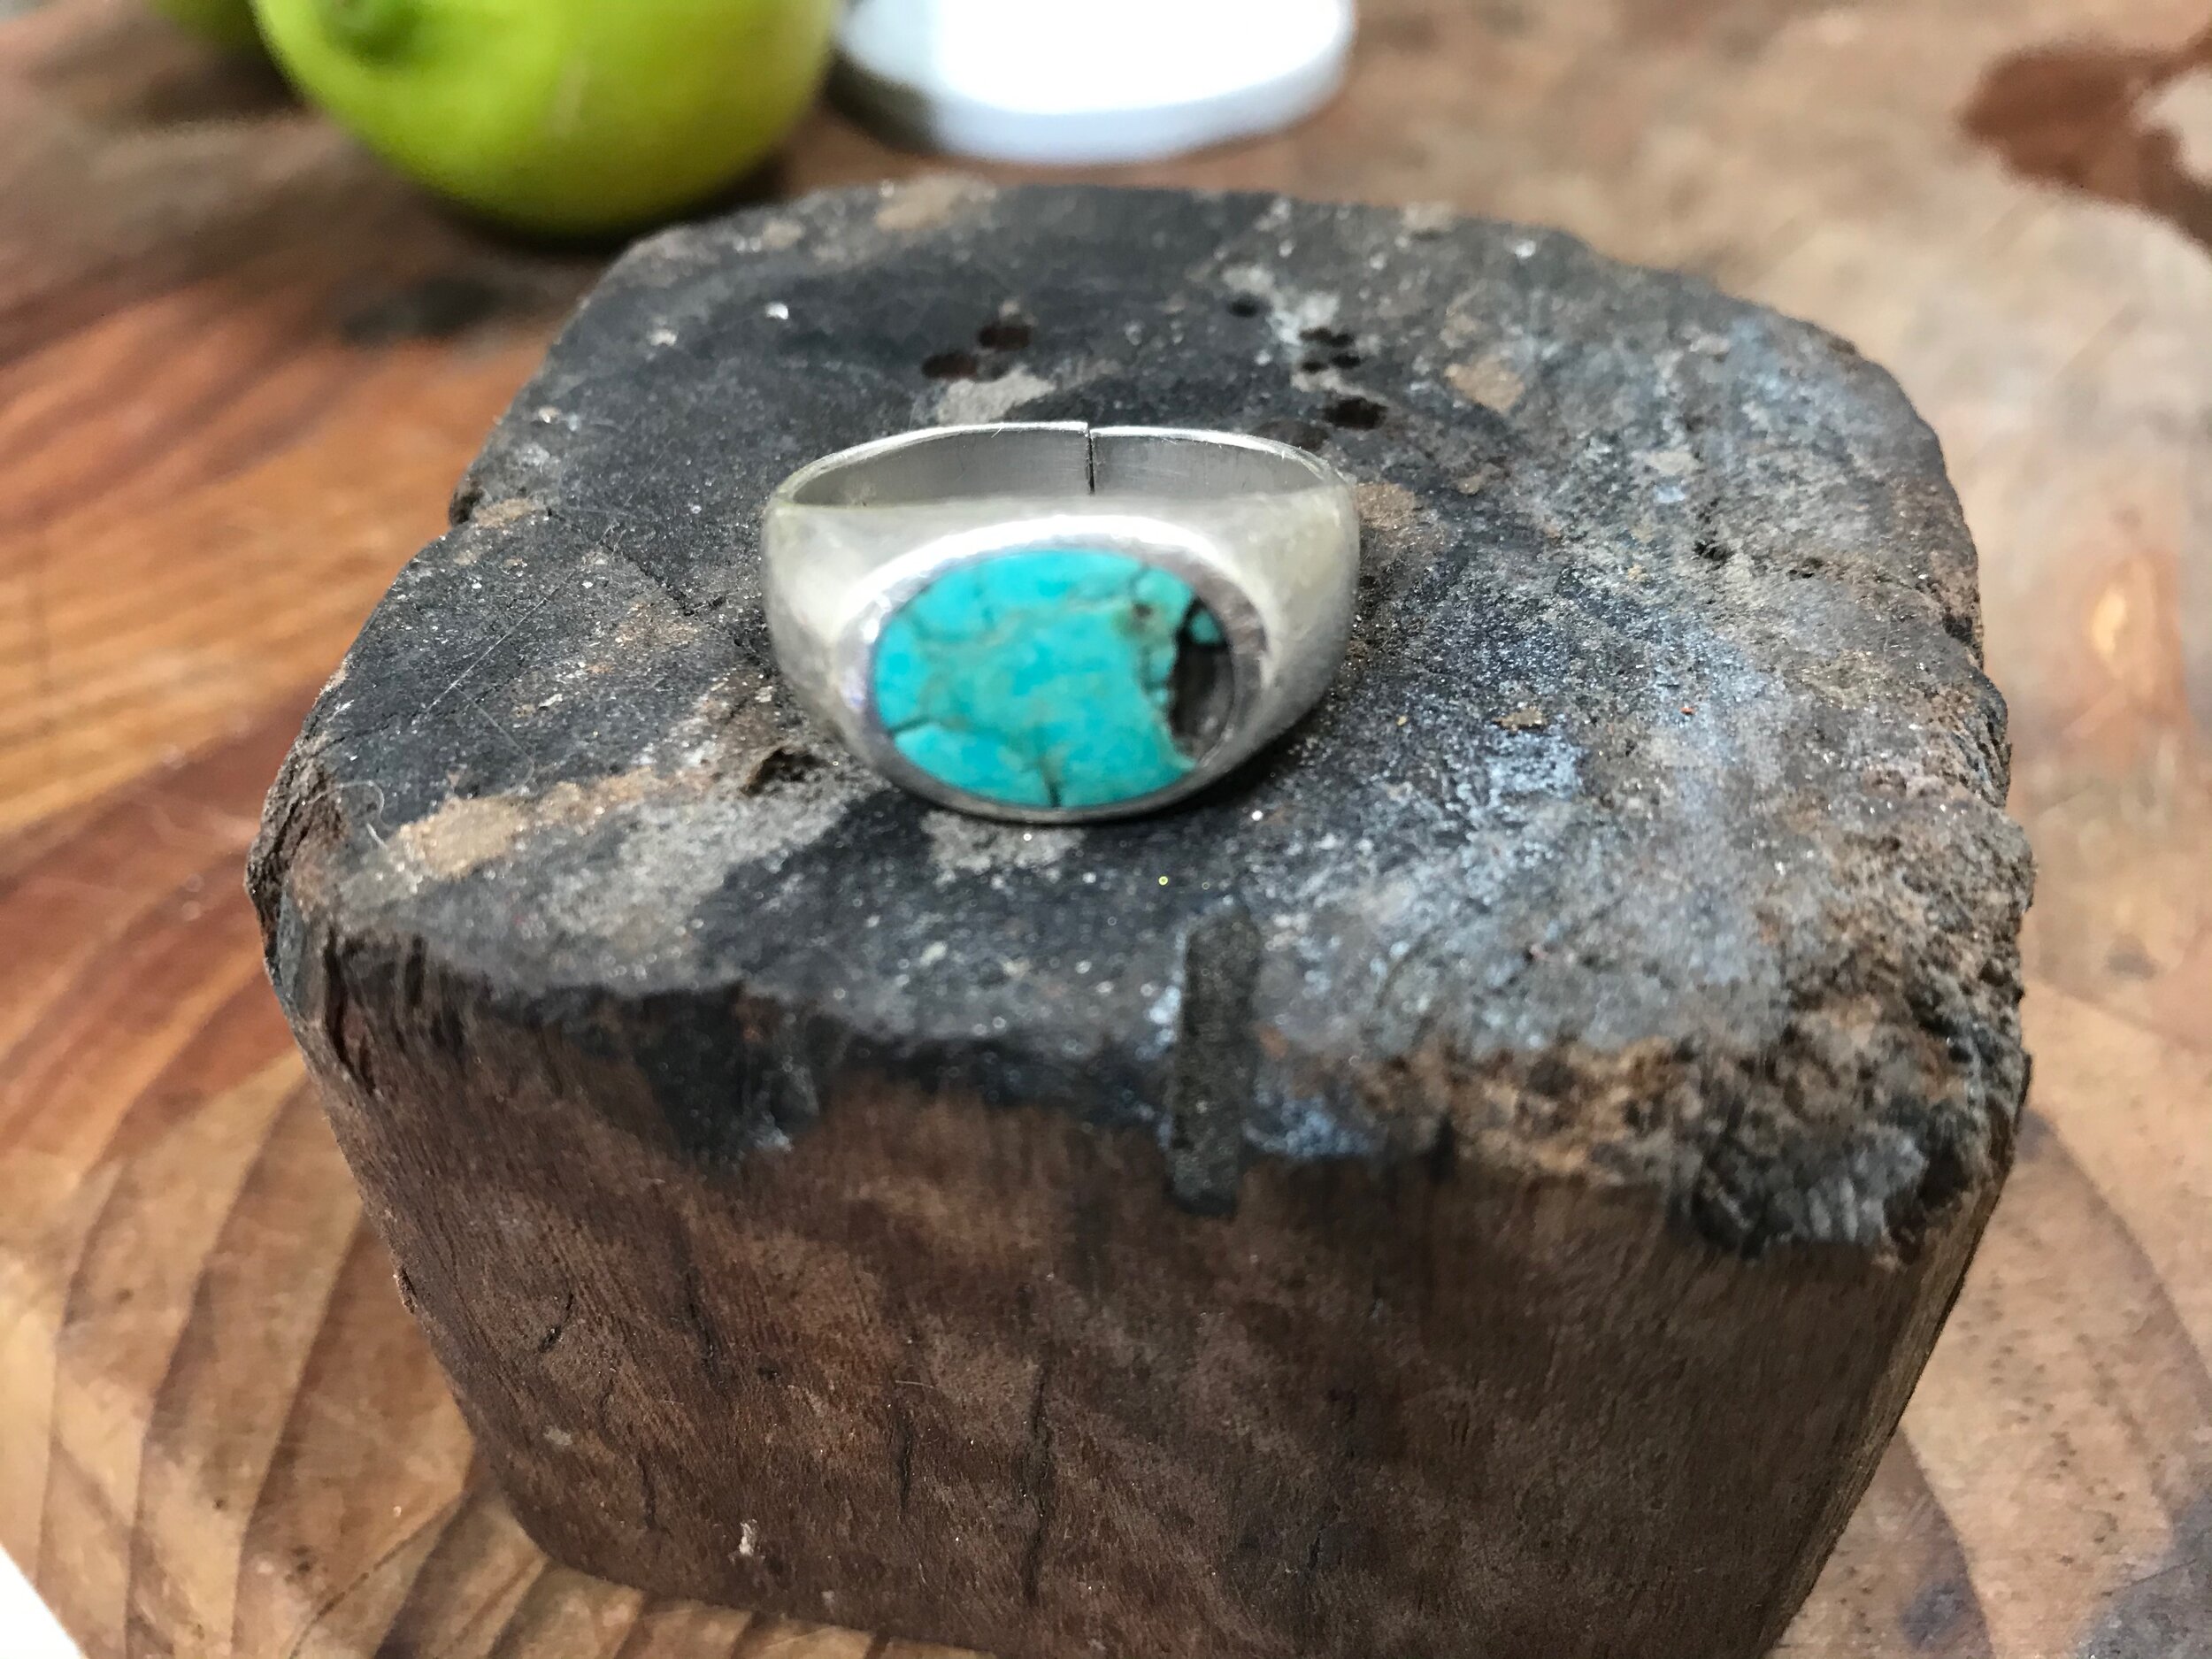
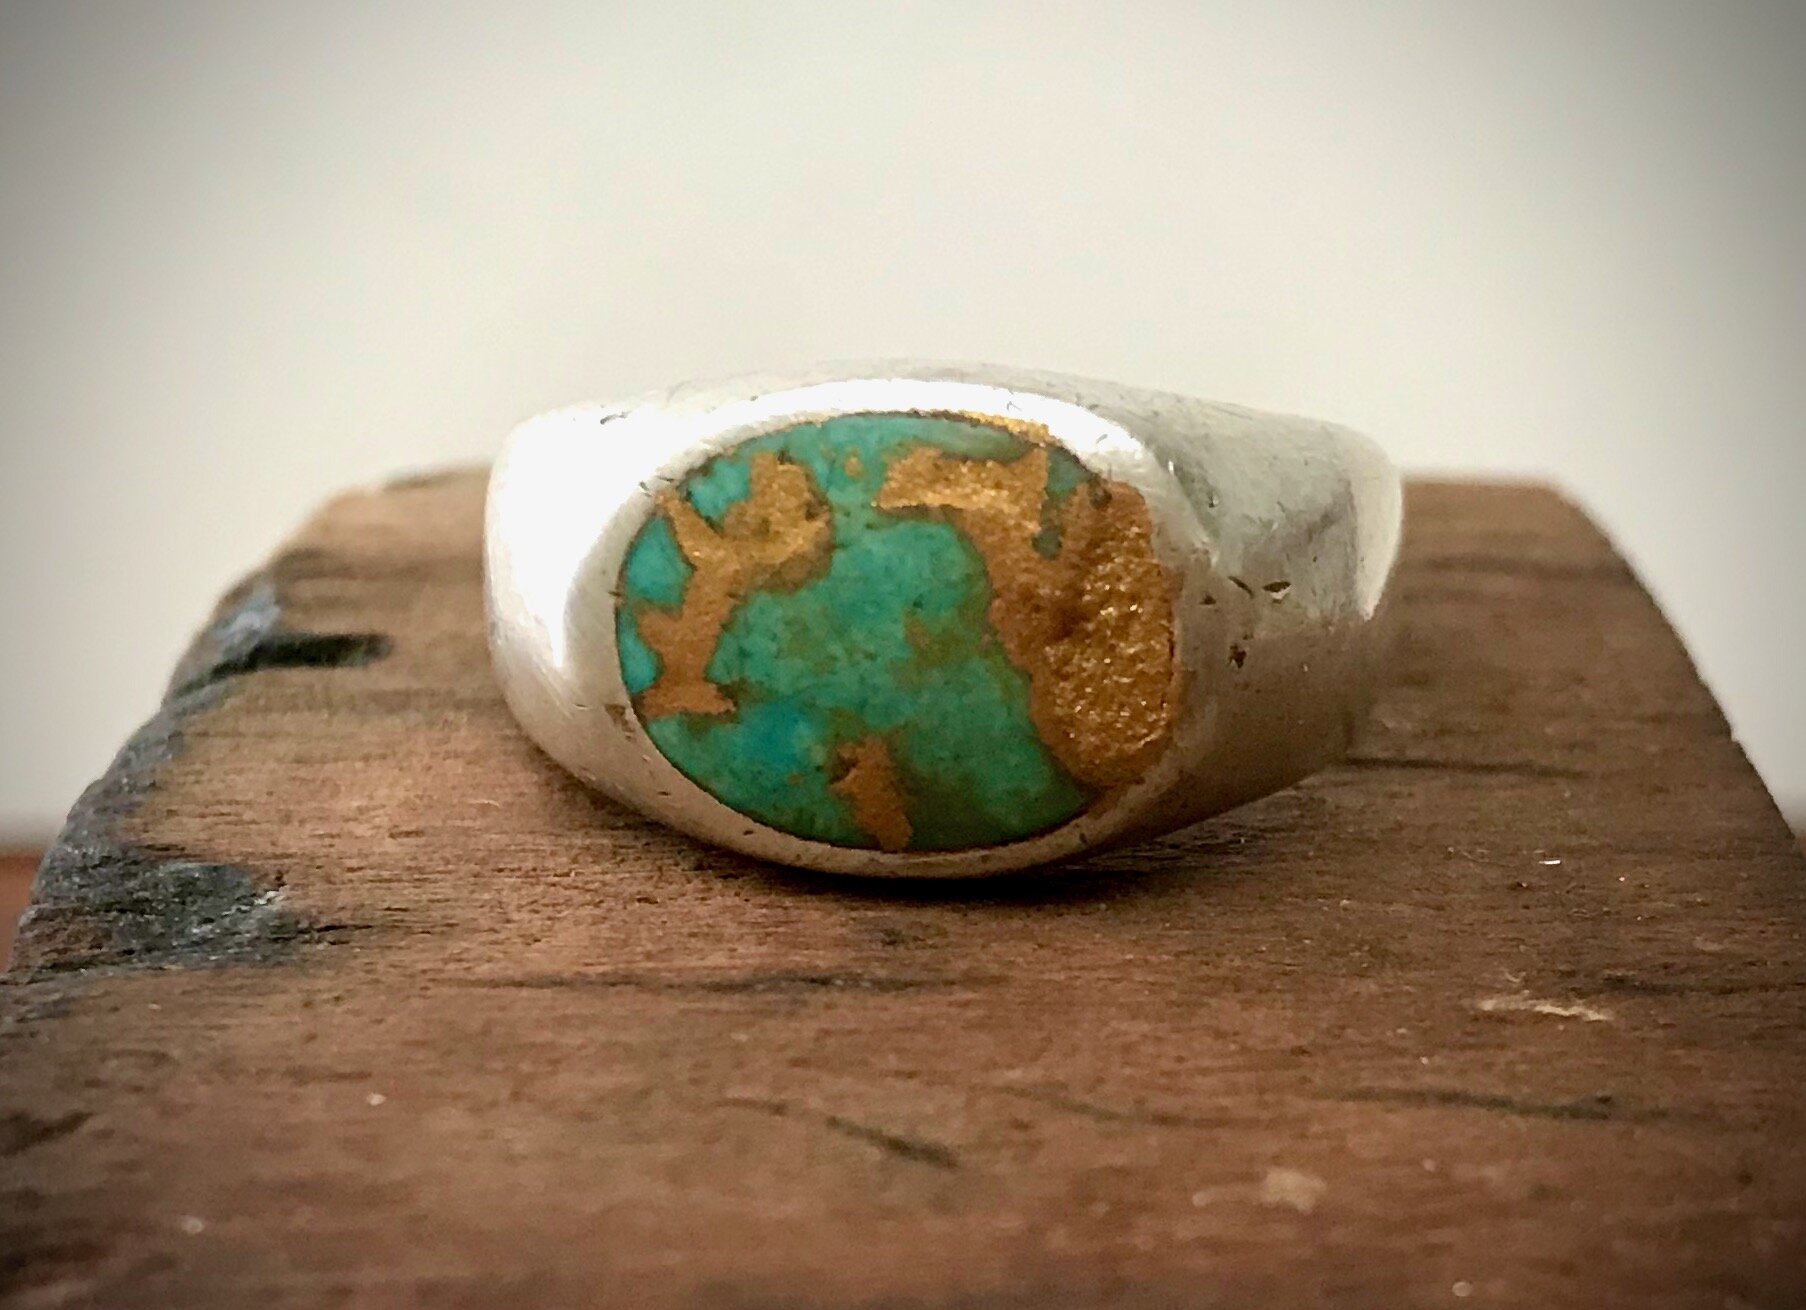
Gabrielle with something complete different – a turquoise and silver ring – the turquoise had broken away and had left some big cracks in the stone.
Also recently Ashley with a large pottery bowl smashed in transit.
You can see many of the pieces I’ve repaired on our Insta account.
I’ve had such lovely kintsugi challenges to work on.
Each of these beautiful pieces were stunning and so special to their owners. It’s been such a pleasure to fit these together to give them a renewed life.
The platters have been especially challenging as they were in so many pieces. And whilst they haven’t come together as perfectly as I’d have liked them to they are now even more special to their owners.
You can read about the special little broken tea cup I repaired as the Goose and I started our kintsugi journey. I’d really love to visit a school in Japan and study this beautiful art form with a true master hopefully it will happen in the not too distant future.

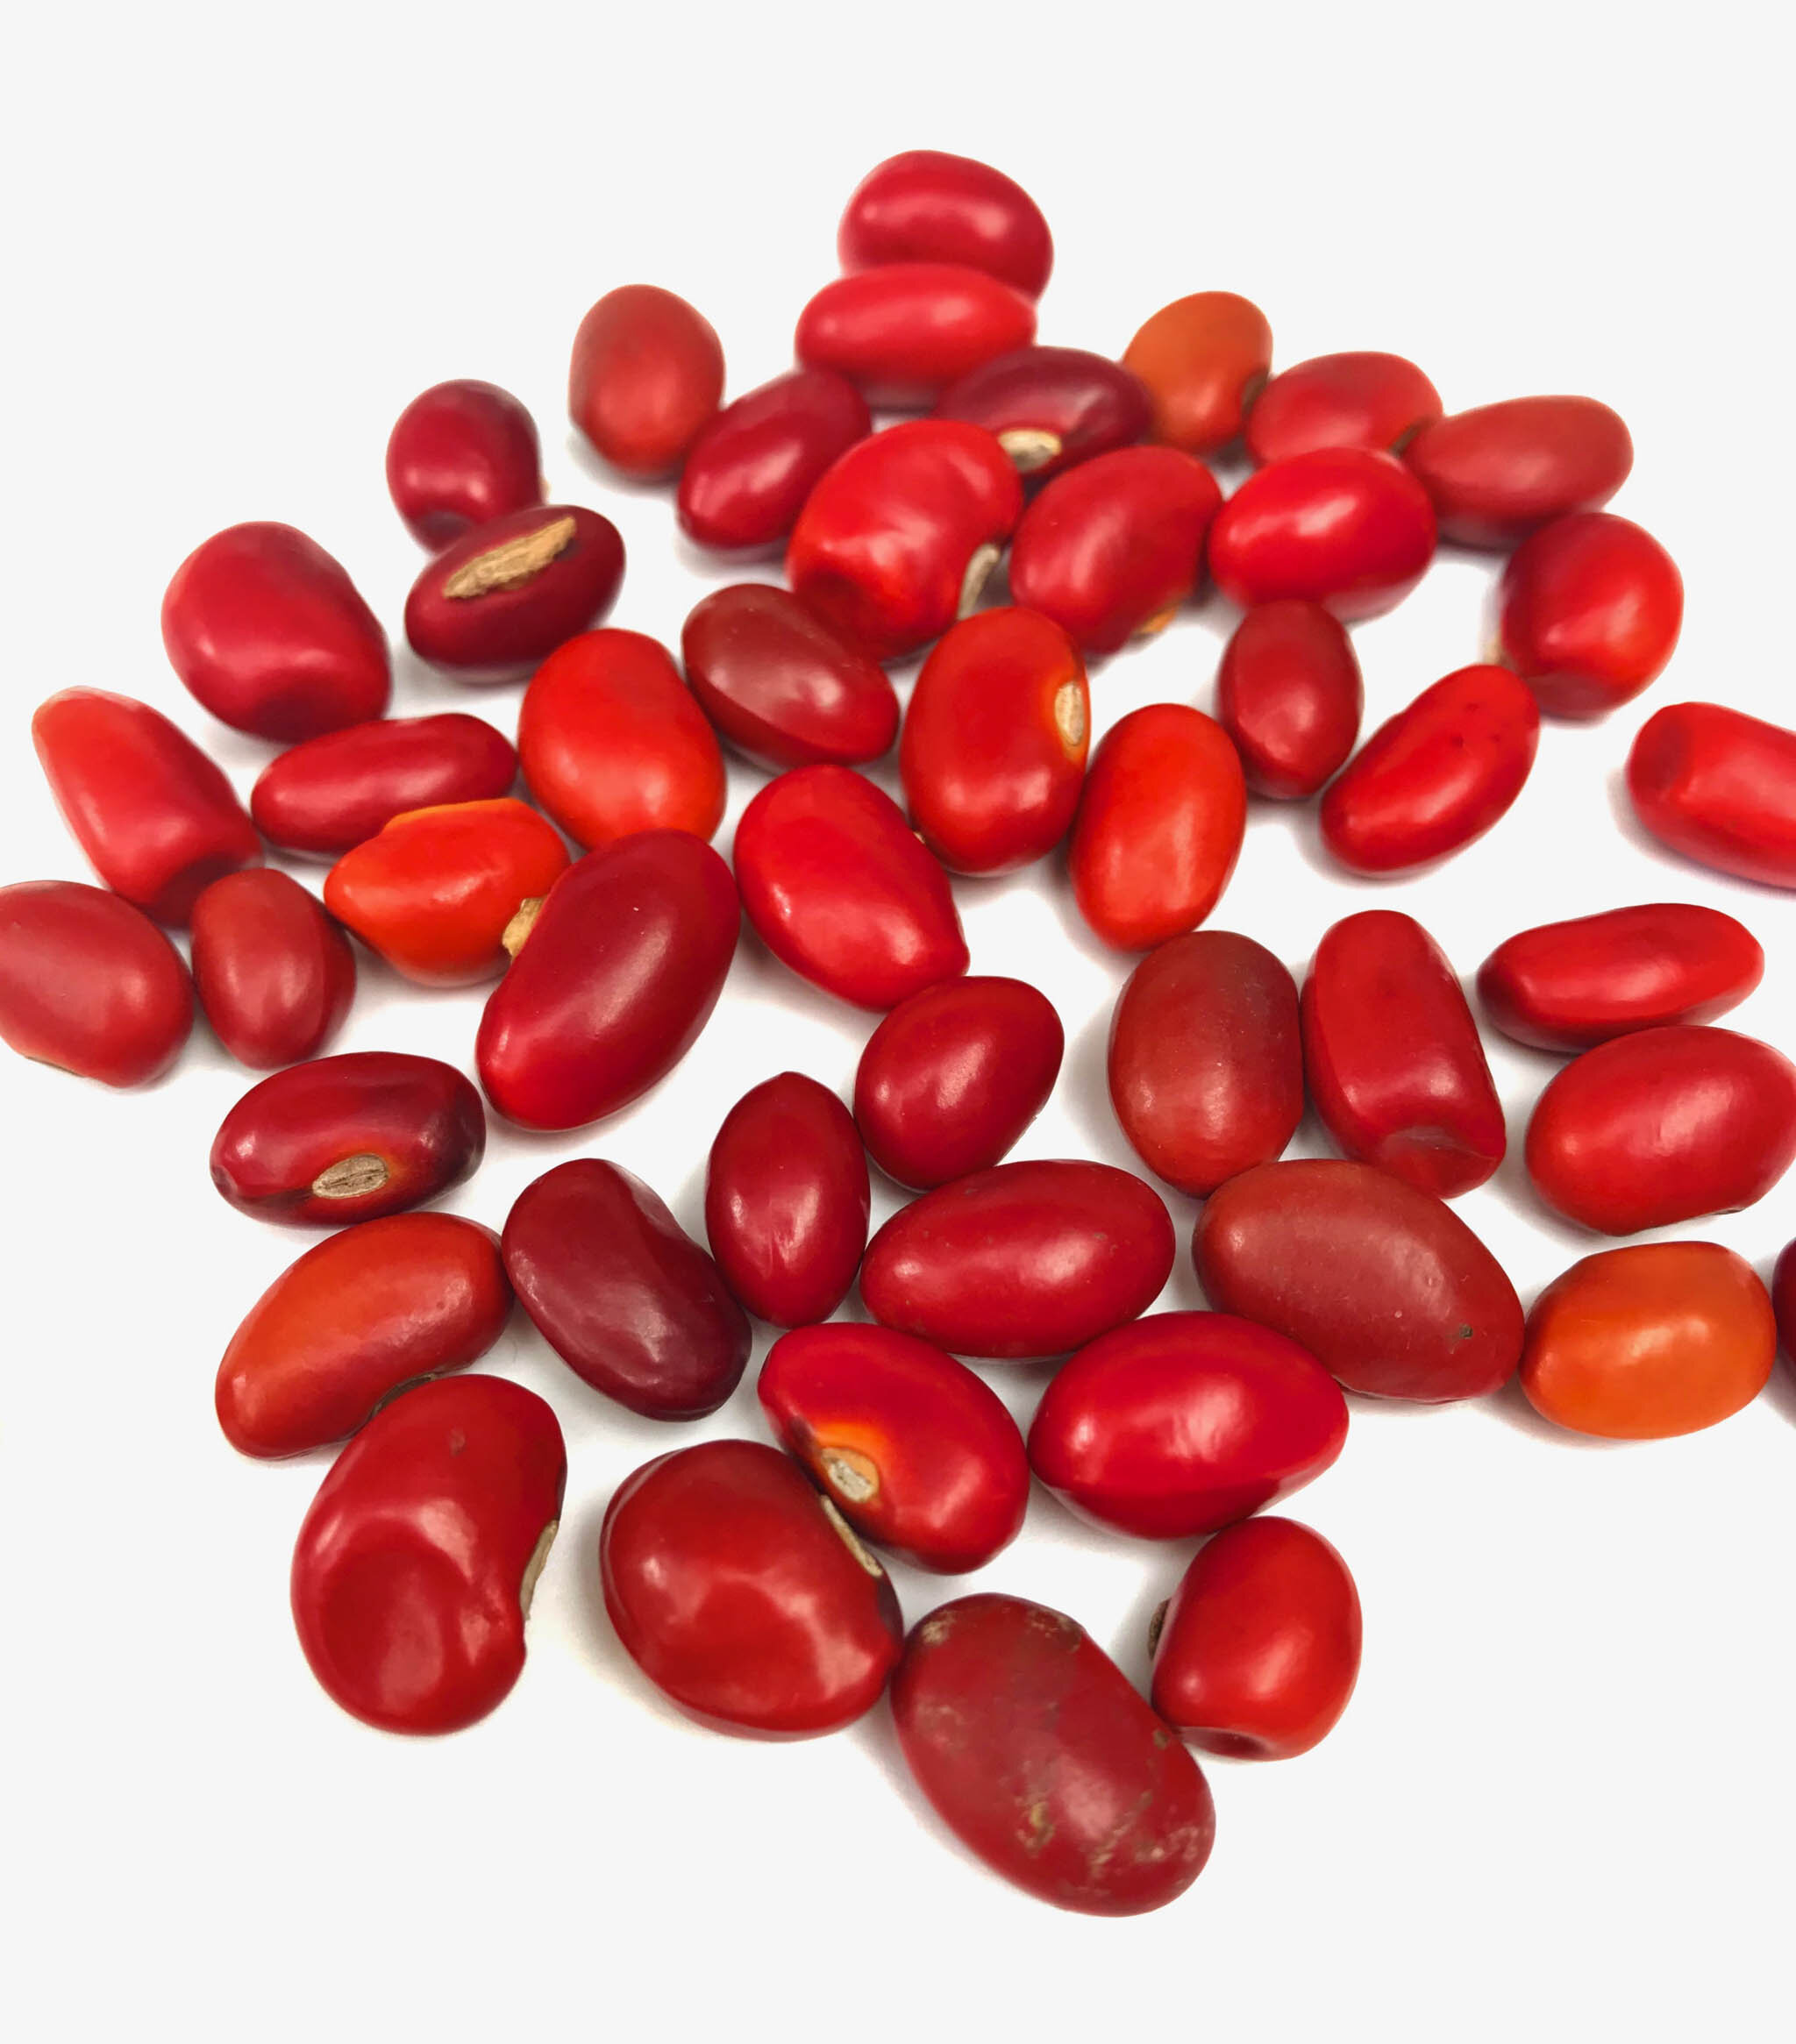
Ininti seeds
I only recently found out about these amazing seeds that are native to the north and north east deserts of Australia.
A friend asked me to make her several pieces of jewellery incorporating my silver work with the seeds and other elements. We have chosen freshwater pearls and lapis lazuli to start playing with ideas to see how it all works.
We have come up with some ideas but in the meantime I’ve made up these little red Ininti seed earrings combining them with a solid Sterling silver bead and freshwater pearl. They are quite delicate with just a little bit of drop (35mm length) to dangle from your earlobe. There will be more to come.
These would make a lovely addition to your Christmas wardrobe - order your pair now in time for Christmas.

A bit more about the seeds…
Jewellery is an important part of Aboriginal culture. Aboriginal women pick up these beautifully coloured beads when foraging for food and use them to make jewellery. They use a stick heated in a fire to burn holes into the seeds. Traditionally they would string the beads onto long strands of string hand spun from human hair. These body ornaments were worn in harnesses over the shoulder, across the chest and under the arms. Strands of beads were also worn as a headband to hold feather headdresses in place.
The seeds come from the Bat-wing Coral tree, which gets its name from the unique shape of the leaves. Aborigines have used the timber for thousands of years for making Coolamons and Woomeras because it is easy to carve, light to carry and can be used to start fires with friction. The tree was also used medicinally, the bark apparently used as a sedative. The seeds come in a range of colours: shades of red, brown, orange and cream.
The seeds are toxic if swallowed so they need to be kept away from young children who may swallow them accidentally.

Our kintsugi journey
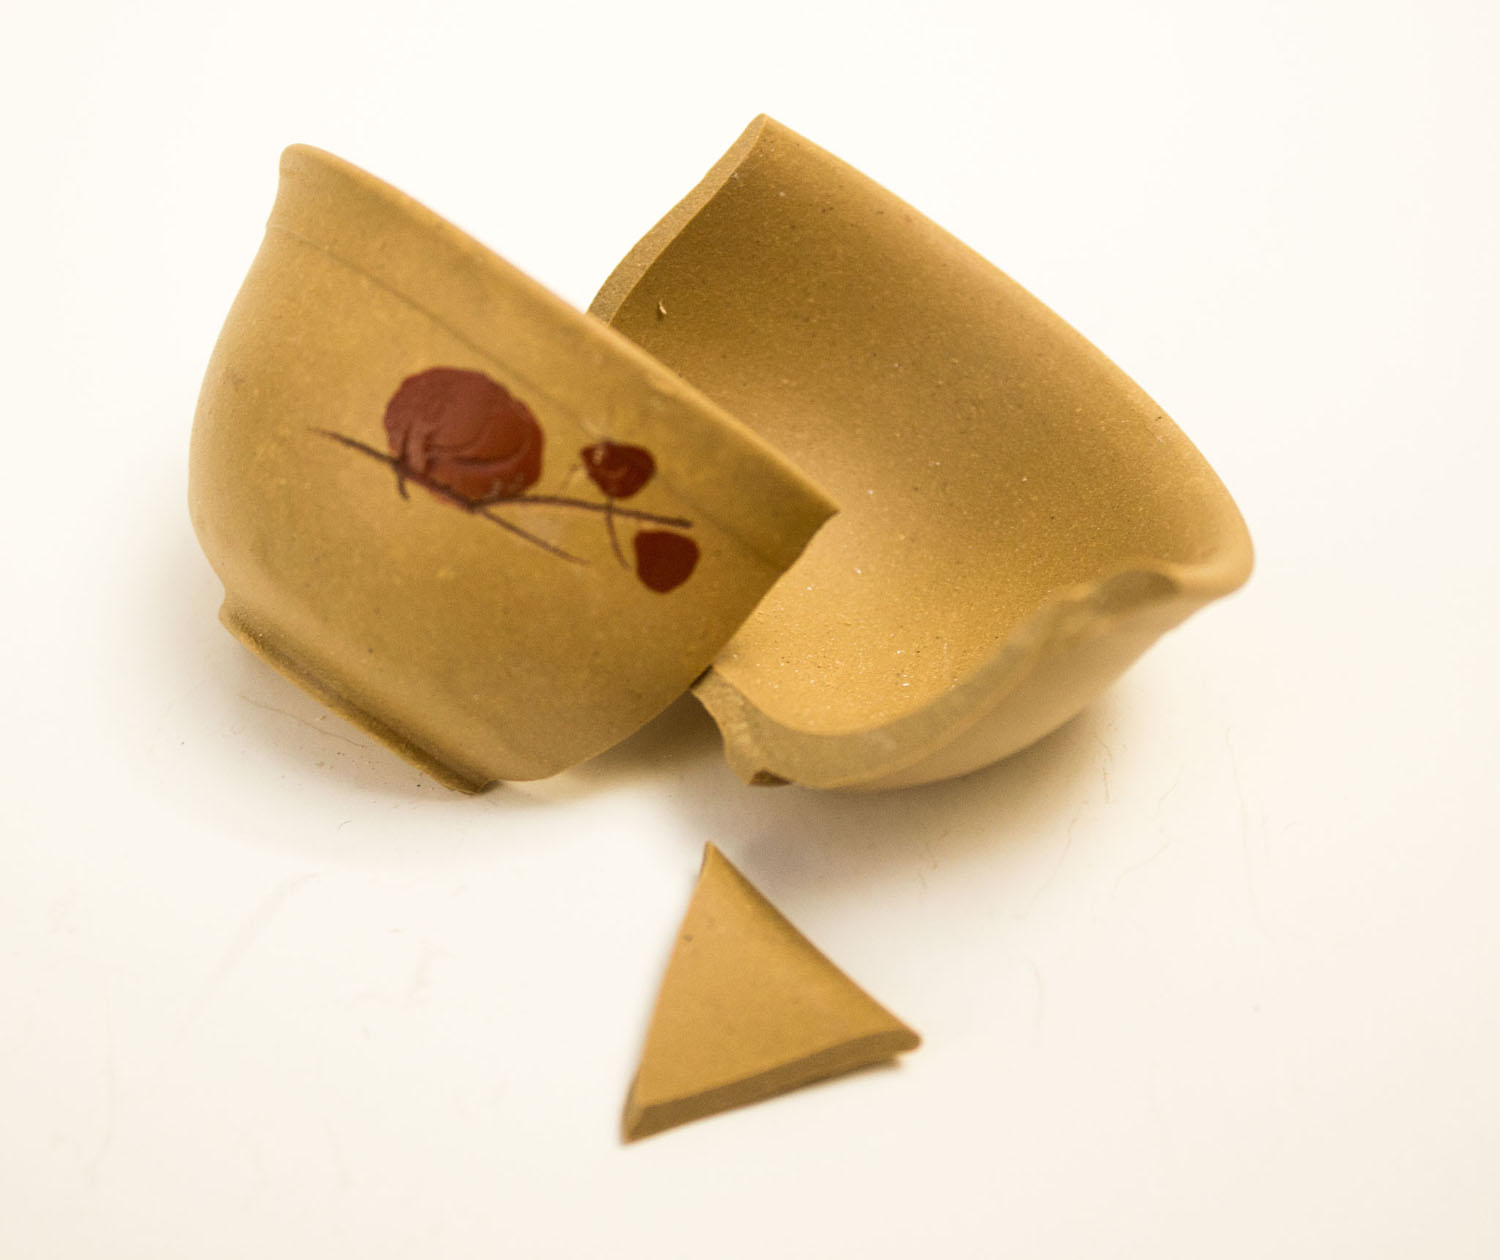
So the Goose and I decided to give this kintsugi technique a bit of a go when a friend said she had this little broken tea cup.
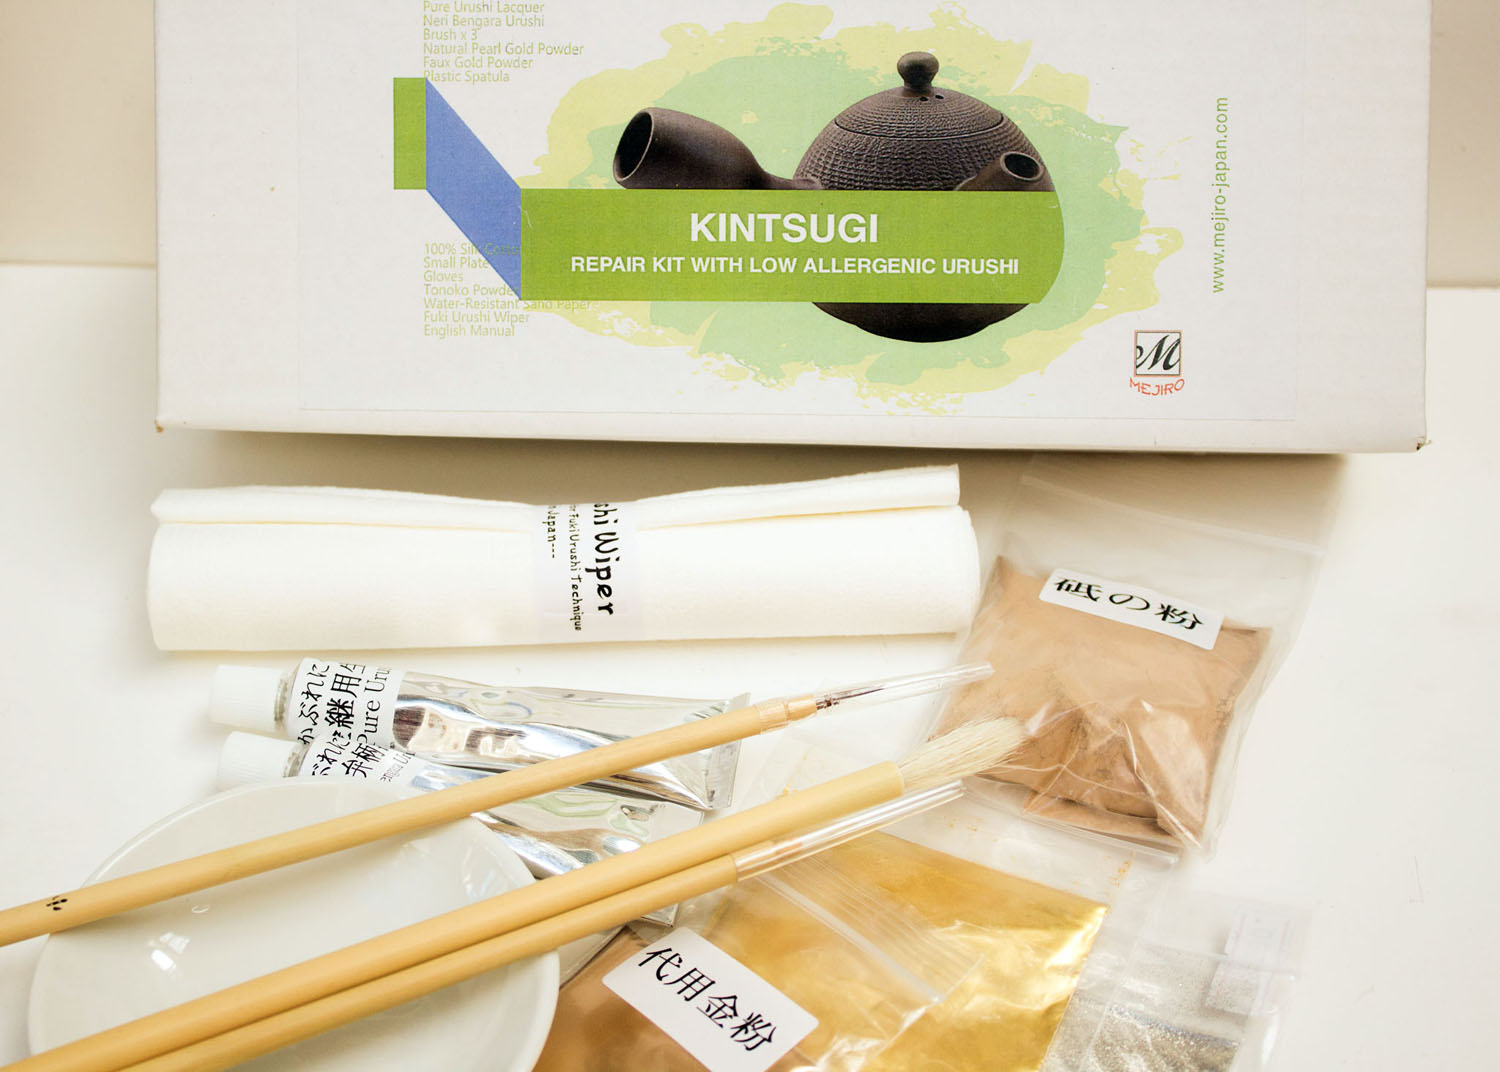
First we found and purchased a kit from a Japanese supplier. I just love Etsy – not only as a great platform to display and sell my hand crafted work but as a source for all sorts of things.
This arrived pretty promptly because they only ship express (costs of course) due to lost parcels – oops Australia Post!
The day we decided to do this it was over 30 degress. Yes it was unseasonally warm for Adelaide as we are technically in autumn and temps should be low 20s at this time. However warm day it was and probably not the best day to mix up a paste of flour, water and low allergenic Japanese Urushi lacquer. You mix it to a stiff paste and it is quite hard to work with. Also the gloves they included in the kit were too big. They kept getting in the way but the pieces of the broken tea cup came together really well.
The good news is though that while urushi lacquer is like poison ivy and brings you out in a rash I’m not allergic to it. I was able to dispense with the gloves and use my fingers to clean up the bits of paste that were going everywhere.
Once I’d “glued” the pieces back together with the urushi paste and cleaned up the pieces I put the whole tea cup into a muro. This is a highly technical piece of equipment – cardboard (or plastic) box with a lid, a damp towel and some chopsticks. The chopsticks form a framework to sit the glued piece on and these sit on top of the damp towel. You ensure the box is covered and kept in a cool place for 10-14 days then you wait. At the end of the 14 days the piece will be dry and firmly glued.

The little teacup came out well. You can use a fine grade of sandpaper to file back any little nicks or lumps in the join and to remove any spots where you may not have cleaned the paste off – but it’s better to clean that off before it dries fully.
On to stage 2!
This involves mixing another flour paste with Neri Bengara. This time it wasn’t such a hot day and the paste worked a little better. This mixture gets painted over the “glued” crack. You need to paint a very fine line over the crack as you don’t want it to be thick and lumpy. This turns out to be much more difficult than expected mainly because you are working with such a small piece of pottery with a hairline crack. Tricky.
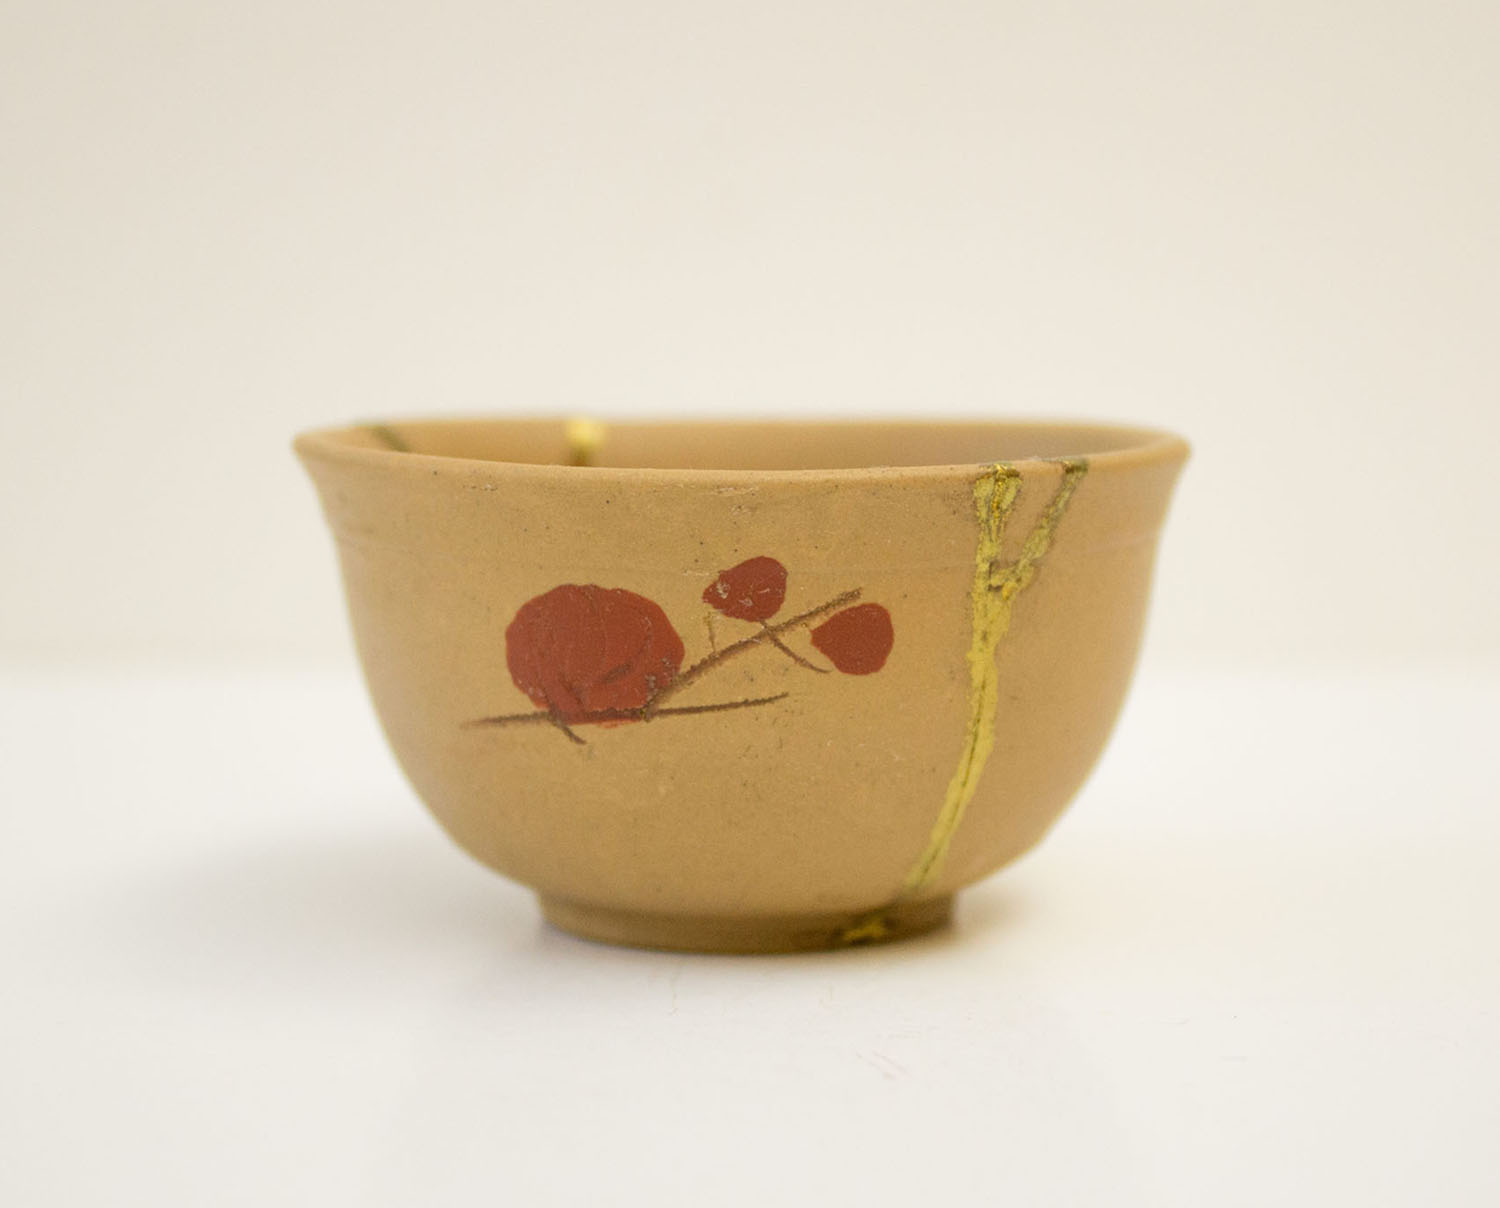
Once the crack is covered it sits for about a half an hour in the muro. You then dust the join with gold or silver powder; then gently brush the excess from around the join (not touching the join). Back into the muro, this time upside down to keep the gold powder on the join across the base of the teacup.


Another week later and it’s out of the muro for good now. I brushed off any excess gold powder and there it was – finished and like new but in some ways better.
Ok so the line is a little wonky in places and a bit uneven but it looks good.
Would I do anything differently?
Yes – pick a cooler day to work with the pastes and use a finer brush to paint the neri bengara over the join but otherwise it’s like a lot of hand skills – it requires practice. I'm really looking forward to doing some more kintsugi repairs. I have some great ideas for jewellery pieces with kintsugi features and will post them as I work on them.
You too can experience the special art of Kintsugi.
Do you have a special piece that is broken? Would you like help repairing it?
Email me with the details and a photo.


Are you a romantic?
Are you a romantic? A young couple made this Sterling silver ring together as an engagement ring - now that's romantic!
This gorgeous ring (not my design – wish it was) was made by a couple in Bali a while ago. Kendall rang me a few weeks ago to ask me to alter it. I hadn’t seen the ring when we first talked about it but she said it was rustic but that because she and her fiancé had made it together it meant a lot to her.
When I saw the ring and what she wanted I was a bit hesitant but thought it wouldn't be too much trouble. Little did I know and a number of things went wrong when I started to work with it. I’m sure it was just the way the stars were aligned that day but anyway with a bit of thought and some new found expertise I got the changes made.
The next problem was would it fit? I explained to Kendall that I’d had a few problems but thought I’d got it just about right. Well as it turned out I had. It fits her close to perfectly… though I’m waiting to hear how it goes now we have some hot weather (some of us get swollen fingers when it gets super hot and rings can get a bit tight).
I was really pleased I was able to resize the ring – I had to reduce the size. Normally this would be a simple alteration but with this design it was quite tricky. Anyway everyone is happy and I must admit I love the design.
What do you think?
Would you make a silver ring with someone special? Or aren’t you romantic…

Top 5 tips for jewellery cleaning
The best way to keep Sterling silver jewellery free of tarnish is to wear it, but if your favourite jewellery has seen better days you can do something about it with these top tips.
The best way to keep silver jewellery free of tarnish is to wear it, but if your favourite jewellery has seen better days you can do something about it — besides selling it on Gumtree.
Remember: using chemicals or other harsh and abrasive cleaners is not recommended for soft stones like opals and pearls. Use soap and water only and if you need to use a brush to clean crevices of a setting use a new soft-bristled toothbrush.
Diamonds
Soak diamond jewellery in a solution of 1 cup warm water and ¼ cup ammonia for about 15 minutes, then use a soft-bristled toothbrush to scrub away any remaining grime, especially in the crevices of the setting and underneath the diamond.
Gold and gemstones
Cleaning your gold and gemstone jewellery couldn’t be easier with white vinegar. Simply drop the jewellery into a jar of vinegar and let sit for 10 to 15 minutes, agitating occasionally. Remove and scrub with a new soft-bristled toothbrush, if necessary.
Silver
Cut a piece of aluminium foil to roughly cover the bottom of a small bowl. Heat a cup of water to almost boiling and pour into bowl. Place 1 tablespoon each of salt, baking soda, and dishwashing liquid into the bowl. Place silver jewellery on top of foil and let it sit for 5 to 10 mins. Rinse jewellery in cool water and dry completely with a soft cloth. Discard solution after use.
Pearls and turquoise (& other soft porous materials)
For soft and porous materials like pearls and turquoise, soap and water is enough to get them looking their best. Clean your string of pearls by dipping them quickly in a solution of 2 cups warm water and a few drops of mild detergent (Softly or dishwashing liquid). Wipe each pearl with a soft, dry cotton cloth and lay flat to dry. (Pearls actually stay polished from frequent wear, so don’t be afraid to accessorize!)
Turquoise doesn’t even need soap to come clean. Simply dip a soft-bristled toothbrush into warm water and scrub the stone clean. Dry with a clean cloth, then let air-dry for several hours before storing.
Commercial jewellery cleaners
There are a range of dips and soft creamy cleaners that you can purchase which are quick and convenient. Or you can buy a silver & jewel cloth and give your jewellery a quick rub over before wearing.

Repairing - love it or hate it?
Do you like doing repairs? I don't as I prefer to start from scratch but I've done a couple of lovely little jewellery repairs and alterations using my Sterling silver skills and they've been fun and turned out well.
I ddi’t set out to do repairs but since I started creating jewellery I’ve had a number of people ask for repairs and alterations. Some of them I’ve been able to help and some of them I’ve referred on to other skilled artisans.
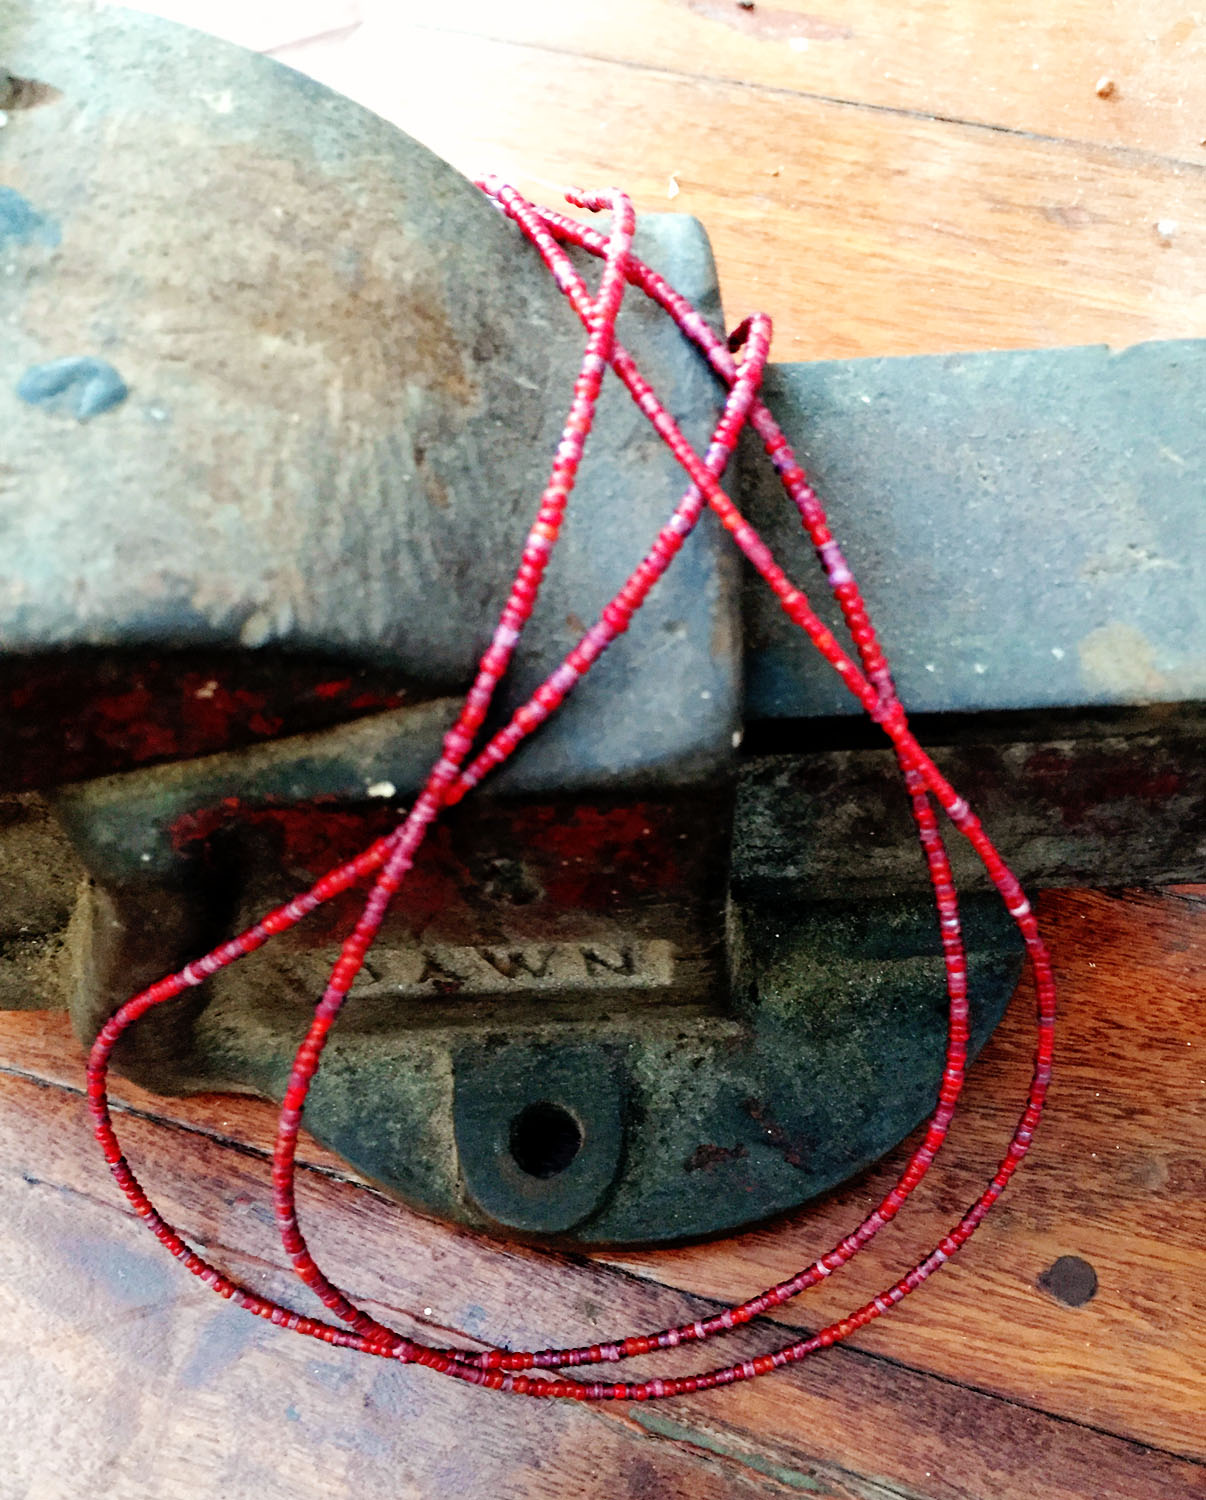
The first one was a beautiful Murano glass bead necklace where the bead wire had broken.
Unfortunately when it broke my friend lost a number of the little red glass beads so I had to hunted around and found replacement ones. This was tricky as they were a tiny bead and not something readily available in Adelaide, but I found a slightly larger bead in the US and got a small string sent over.
I restrung the smaller beads in the middle of the necklace and used the larger ones on either side so they sat at the back of the neck round the clasp where their slight different in size went unnoticed. Needless to say my friend was very happy to have her pretty little red glass bead necklace to wear again.
I’ve also done a little alteration to a rather pretty necklace made of ribbon and glass beads that were made for a friend by someone special overseas. The necklace is a choker style but was very short and so she hadn’t been able to wear it. She asked if I could add some chain to it and lengthen it enough for her to wear comfortably.
I found a small belcher chain in my supplies and adapted it to fit either side of the necklace to a good length. I added a parrot clasp and there it was – a perfect fit and ready to wear.
Yep, I don’t usually do these types of jobs. I do prefer to make a special from scratch but it is very gratifying to be able to work with a client and remodel or repair a piece to their satisfaction so they can use it again.
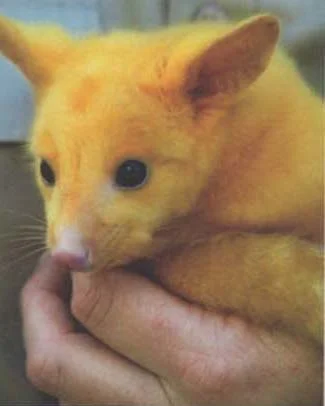
Our house guests...

Isn’t this little fella gorgeous? He’s a very rare golden possum and I found this article about him in a recent National Trust newsletter. Fortunately or unfortunately he isn’t the type of possum that has taken up residence at our house. Ours is a common brushtail. Luckily for us she, as it turns out, took up residence in our carport. Lucky because you really don’t want a possum living in your roof, rare or otherwise and because they are territorial it is very difficult to move them along.
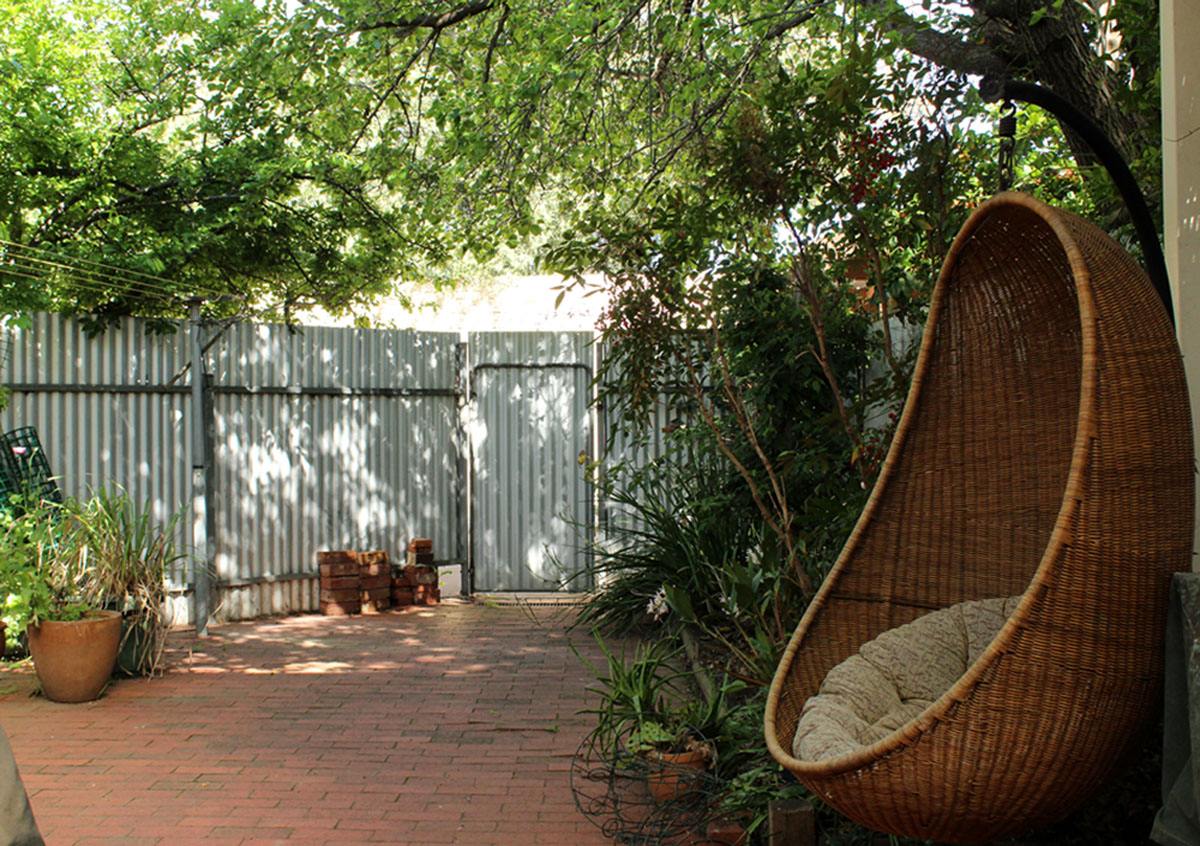
We discovered she was a she when the one tail we could see hanging down from a drainpipe at the back of the carport suddenly became two tails, one much smaller. I’ve posted photos of the tail(s) but it’s hard to see what they belong to. Sometimes we’ve been lucky enough to see a claw hanging down too but tails and claws are usually retracted whenever we walk up to say hello.
As the little one is getting bigger we’ve seen them both out at night feeding off the buds and blossoms on the big trees in the garden next door. Sometimes the mum is carrying the bubs on her back and sometimes they are moving independently. Whilst I’m not that happy about having to clean up possum poop from my backyard, in some ways its quite nice having nature that close to us in such a dense urban environment. I’m not sure if they are here to stay permanently or whether as the little one grows up they will move on to someone else’s carport!
The original Silver Goose...
This is the original Silver Goose.
I've always loved jewellery.
My thing has been to buy a pair of earrings everywhere I've travelled.
I have a beautiful pair of jade Maori fish hooks from Queenstown, NZ; little silver and coral stone earrings from Peru; titanium frogs from Darwin and lots of others I have collected over the years.
So it was an easy transition to making Sterling silver jewellery once I had done a short course at Adelaide’s Jam Factory.
While I was doing the course I saw the most amazing sculpture in the window of the Jam Factory shop. It was a goose in black boots and the boots were on backwards.
It was cute, funky and out there.
I loved it.
I wondered how this might work in silver and decided to make a brooch for myself to try it out.
I think he came out well and I love him...
While he’s not for sale (well the original isn’t) he was part of the inspiration to sell my fun and quirky silver creations.
You can buy one of our lovingly inspired creations or commission your own special ‘goose’ piece.
Leafy Seadragon, Phycodurus eques (Günther, 1865)
I just love these gorgeous little creatures. Unfortunately when I was diving many years ago I never got to see one in the wild but I'd love to hear your story if you have seen one...
The Leafy Seadragon, also known as Glauert’s Sea-dragon is a spectacular creature, with its elaborate leafy appendages and amazing colour pattern it is superbly camouflaged amongst kelp. It has a long tubular snout, a pectoral fin on its "neck" and a dorsal fin on its "back".
It is found on rocky reefs in depths from about 3m to 50m from Kangaroo Island, South Australia to south-western Western Australia.
It is protected and is the marine emblem for South Australia.
media reports suggest the rare and mysterious leafy seadragon is disappearing from South Australian waters partly due to environmental factors and human intervention.


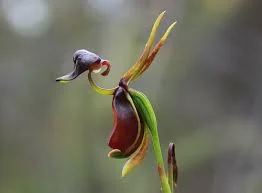
Flying Duck Orchid, Caleana major
This orchid is amazing - about 50 cm tall, it grows in eastern and southern Australia. It so looks just like a male duck in flight! Nature just amazes and inspires me... I'm thinking earrings or a brooch to rival the goose!