Our kintsugi journey
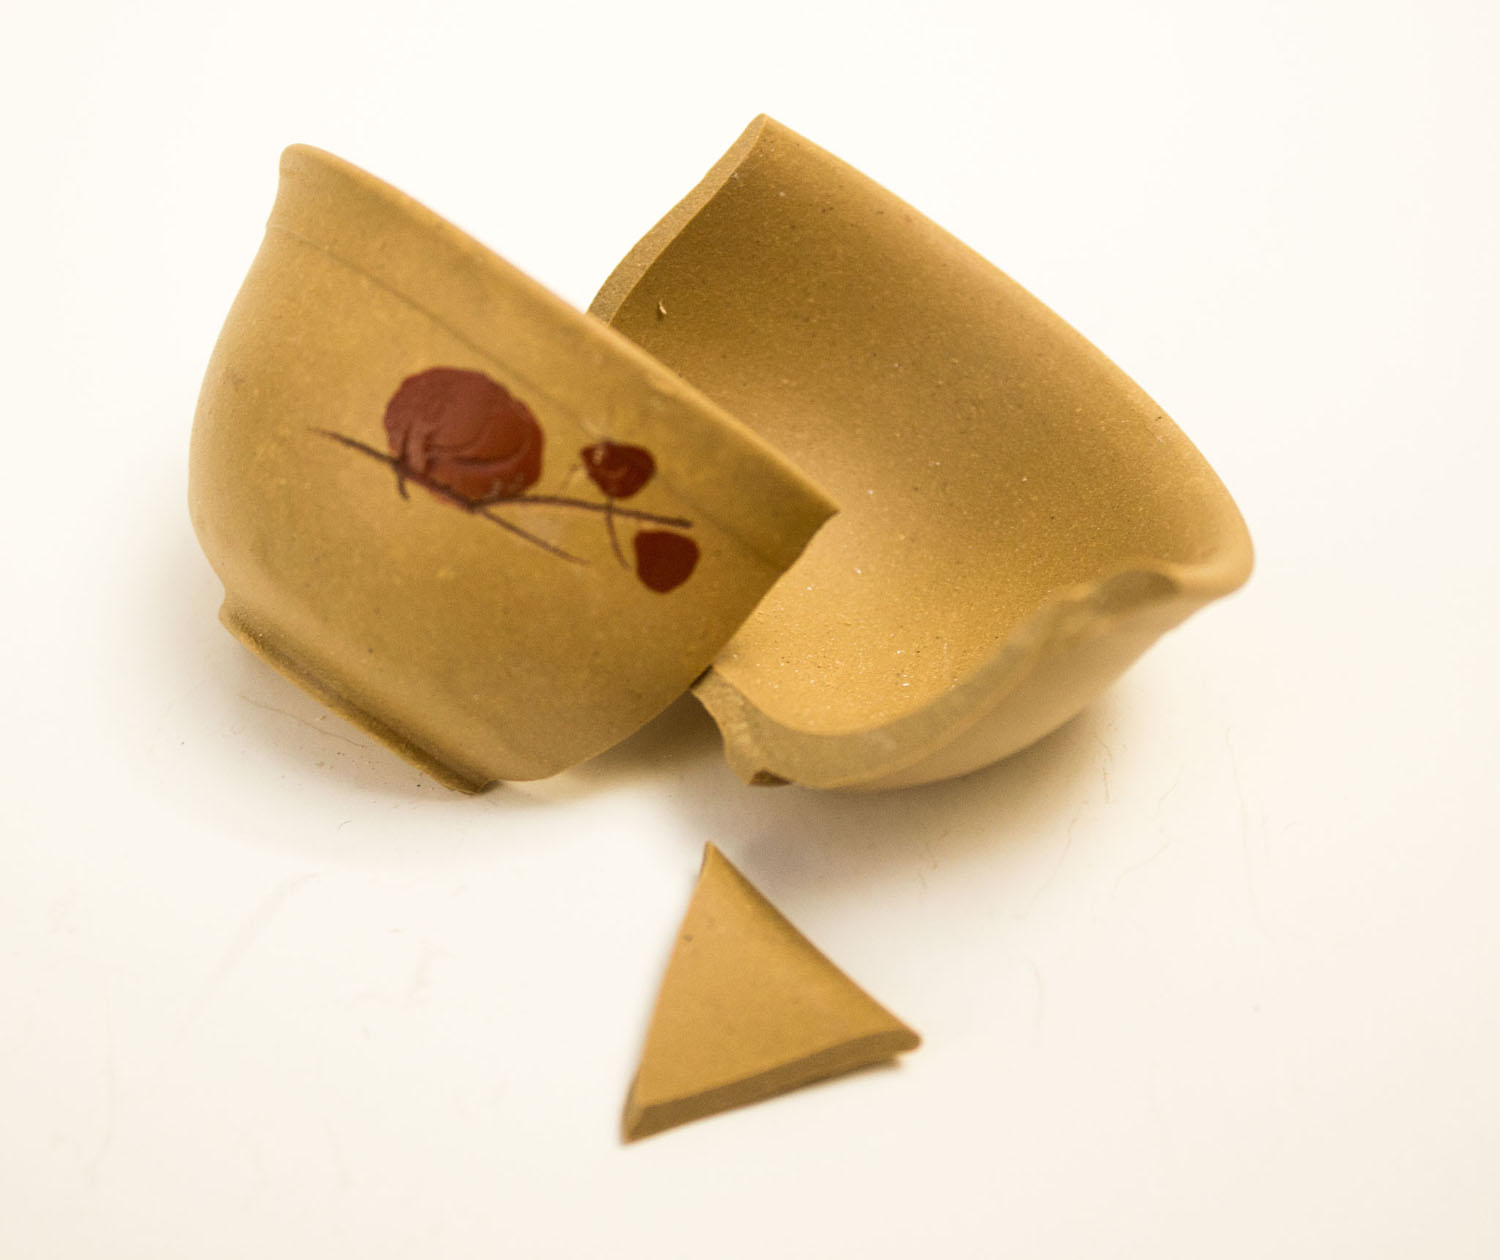
So the Goose and I decided to give this kintsugi technique a bit of a go when a friend said she had this little broken tea cup.
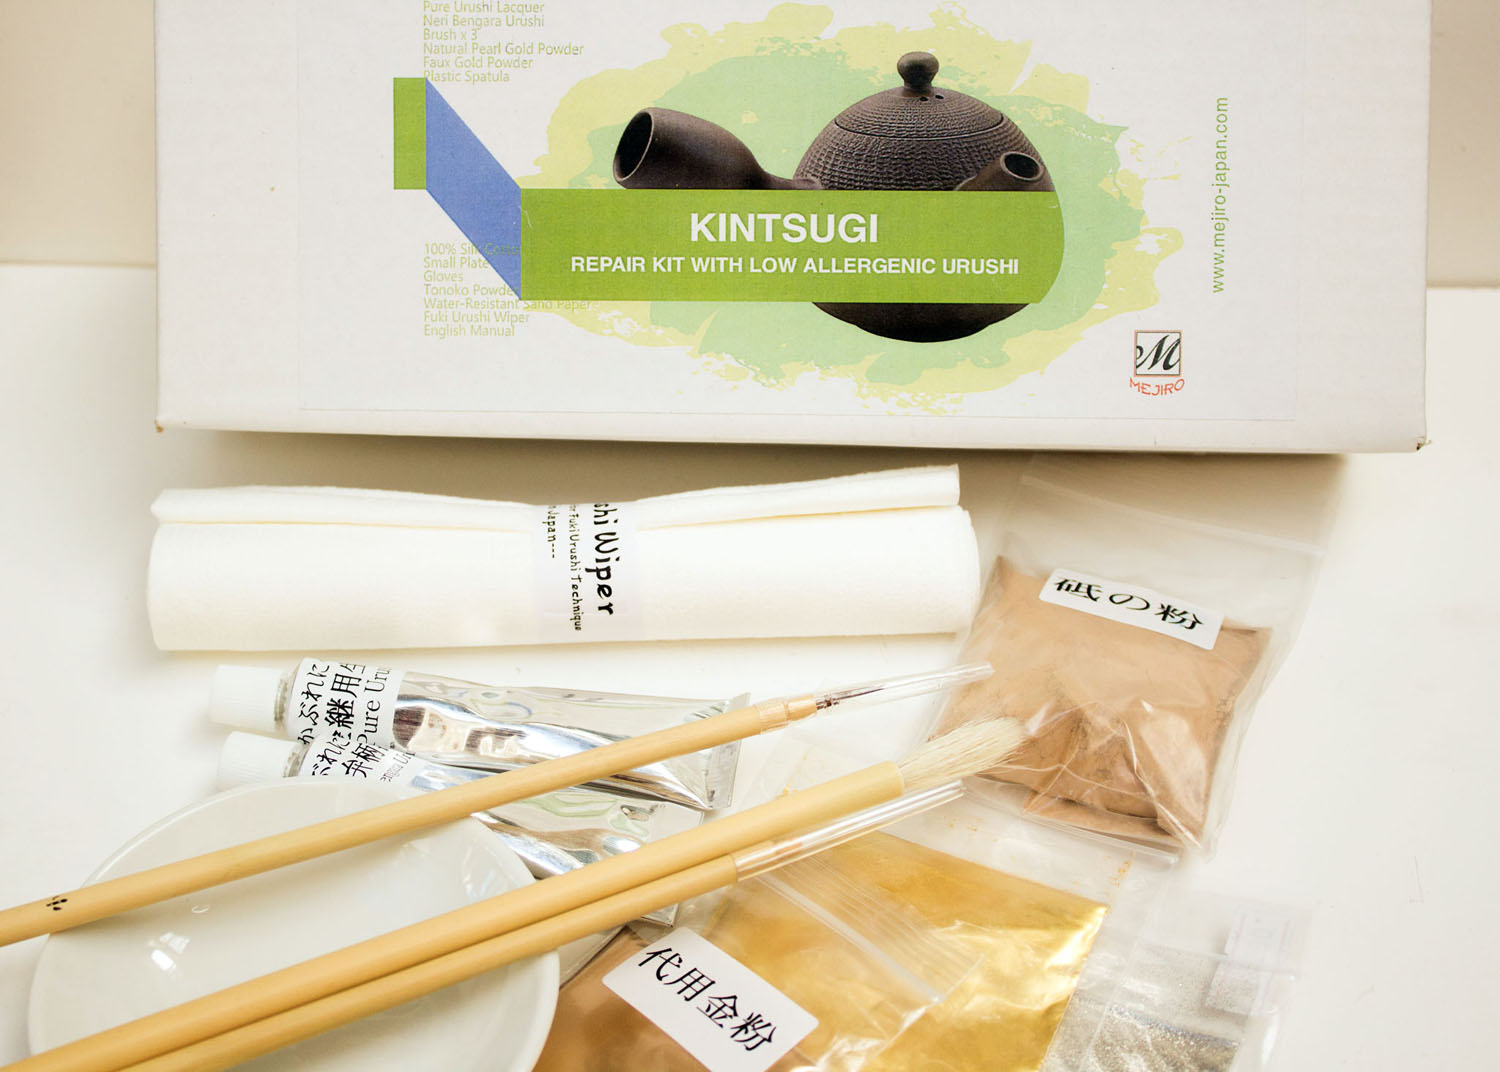
First we found and purchased a kit from a Japanese supplier. I just love Etsy – not only as a great platform to display and sell my hand crafted work but as a source for all sorts of things.
This arrived pretty promptly because they only ship express (costs of course) due to lost parcels – oops Australia Post!
The day we decided to do this it was over 30 degress. Yes it was unseasonally warm for Adelaide as we are technically in autumn and temps should be low 20s at this time. However warm day it was and probably not the best day to mix up a paste of flour, water and low allergenic Japanese Urushi lacquer. You mix it to a stiff paste and it is quite hard to work with. Also the gloves they included in the kit were too big. They kept getting in the way but the pieces of the broken tea cup came together really well.
The good news is though that while urushi lacquer is like poison ivy and brings you out in a rash I’m not allergic to it. I was able to dispense with the gloves and use my fingers to clean up the bits of paste that were going everywhere.
Once I’d “glued” the pieces back together with the urushi paste and cleaned up the pieces I put the whole tea cup into a muro. This is a highly technical piece of equipment – cardboard (or plastic) box with a lid, a damp towel and some chopsticks. The chopsticks form a framework to sit the glued piece on and these sit on top of the damp towel. You ensure the box is covered and kept in a cool place for 10-14 days then you wait. At the end of the 14 days the piece will be dry and firmly glued.

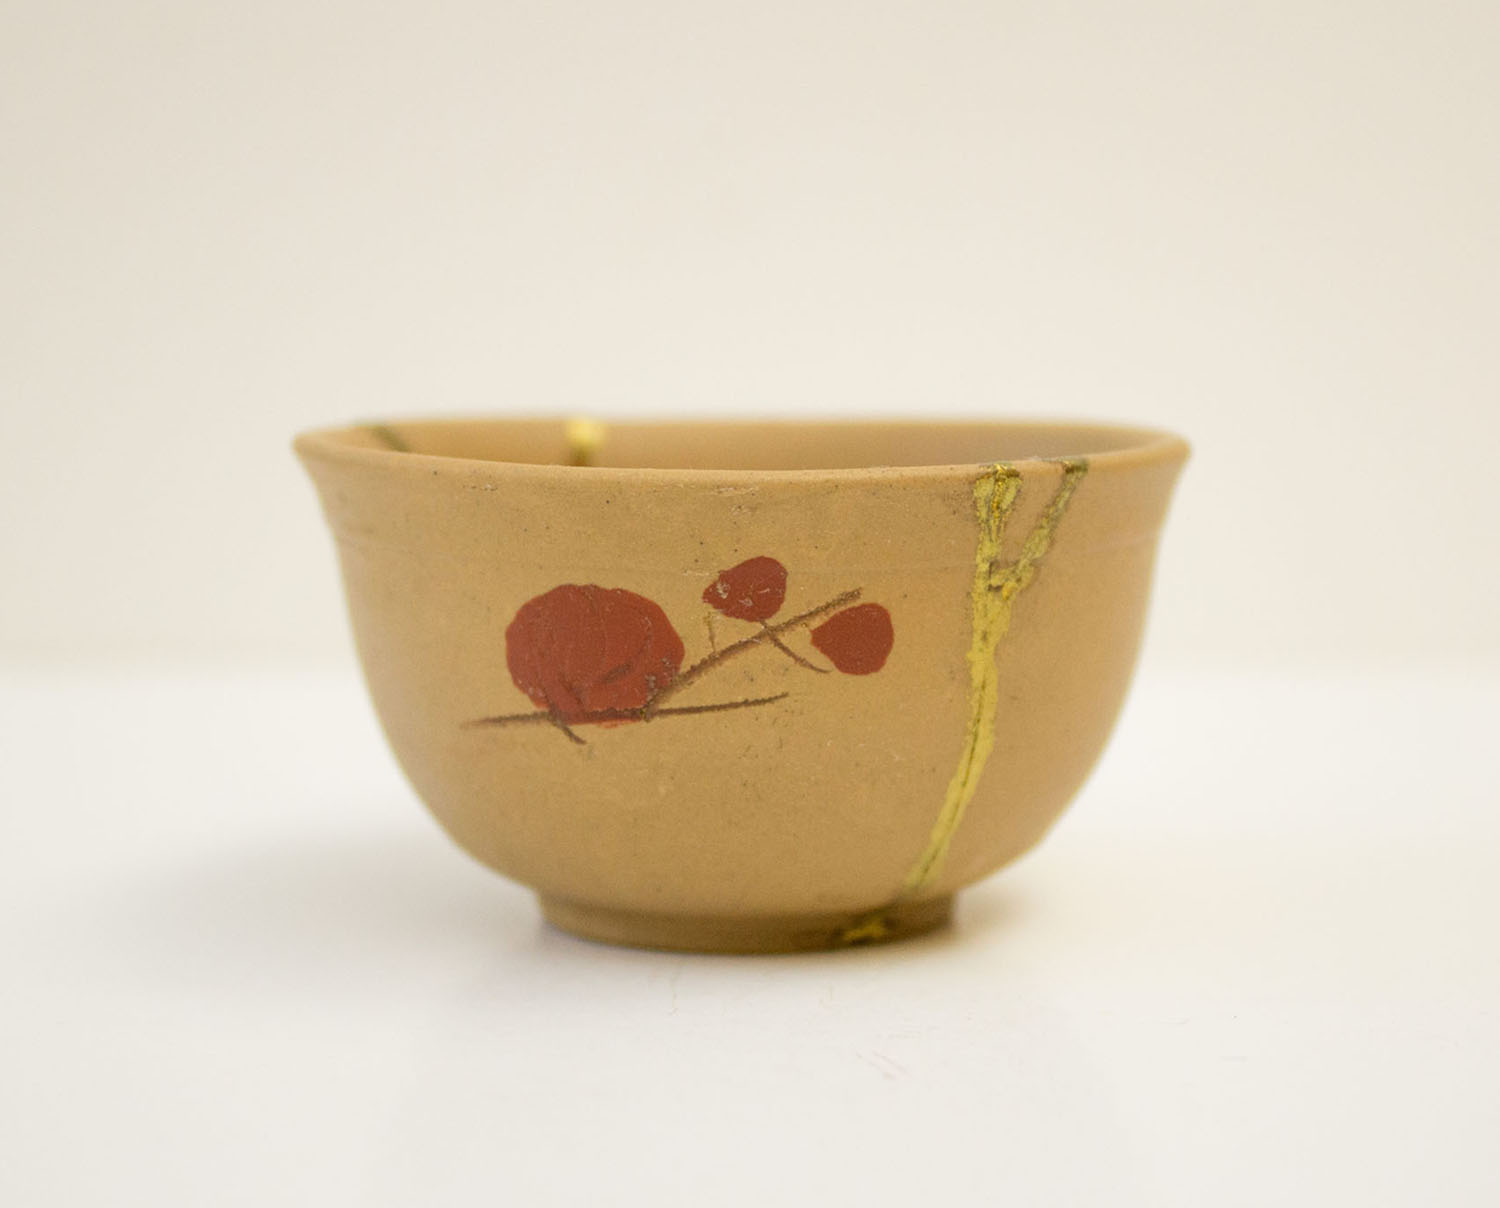
The little teacup came out well. You can use a fine grade of sandpaper to file back any little nicks or lumps in the join and to remove any spots where you may not have cleaned the paste off – but it’s better to clean that off before it dries fully.
On to stage 2!
This involves mixing another flour paste with Neri Bengara. This time it wasn’t such a hot day and the paste worked a little better. This mixture gets painted over the “glued” crack. You need to paint a very fine line over the crack as you don’t want it to be thick and lumpy. This turns out to be much more difficult than expected mainly because you are working with such a small piece of pottery with a hairline crack. Tricky.
Once the crack is covered it sits for about a half an hour in the muro. You then dust the join with gold or silver powder; then gently brush the excess from around the join (not touching the join). Back into the muro, this time upside down to keep the gold powder on the join across the base of the teacup.


Another week later and it’s out of the muro for good now. I brushed off any excess gold powder and there it was – finished and like new but in some ways better.
Ok so the line is a little wonky in places and a bit uneven but it looks good.
Would I do anything differently?
Yes – pick a cooler day to work with the pastes and use a finer brush to paint the neri bengara over the join but otherwise it’s like a lot of hand skills – it requires practice. I'm really looking forward to doing some more kintsugi repairs. I have some great ideas for jewellery pieces with kintsugi features and will post them as I work on them.
You too can experience the special art of Kintsugi.
Do you have a special piece that is broken? Would you like help repairing it?
Email me with the details and a photo.